
Using Portainer to Create Custom WordPress Template on Arm64 Based VPS
This post is to show the steps how to use Portainer to create a custom template to launch your WordPress stack if default stack template is not working.
Related posts:
- Install WordPress Using aaPanel (BT)
- Install Docker, Docker-Compose, Portainer & Nginx on CentOS 8 & Ubuntu 20.04
- Using Portainer to Create Custom WordPress Template on Arm64 Based VPS
WordPress Template Error
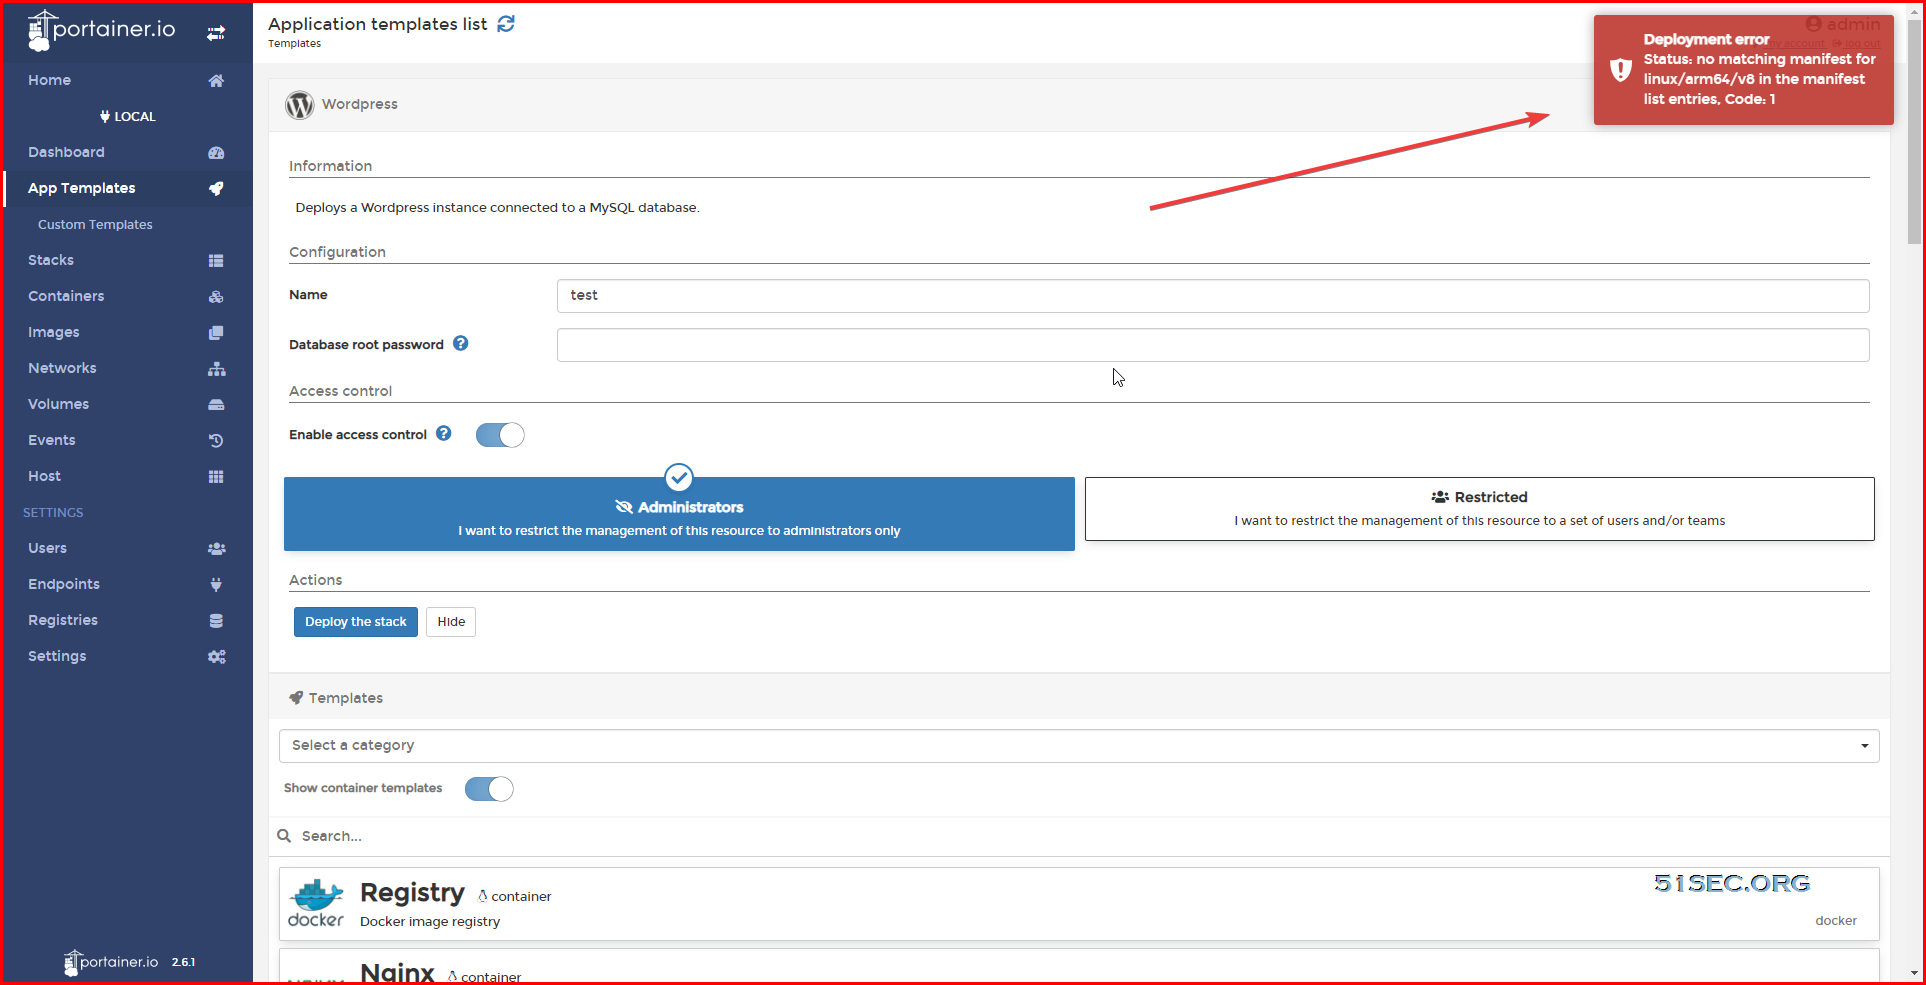
The default template works well for x86 / x64 architecture. Since I am use Arm64 based VPS to do installation, I am having this error message:
It is because they could not find the arm64 based matching image under that linux repository. What we will need to do to fix this issue is to create a custom template to change image name to right one.
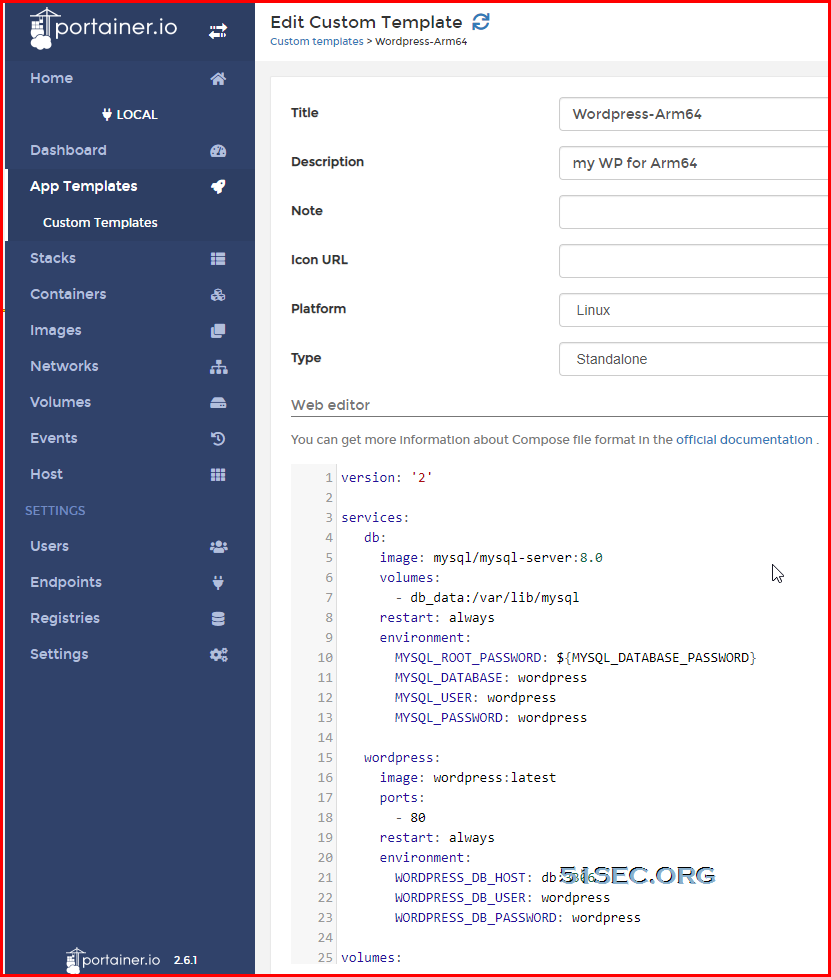
Custom WordPress Template
Based on mysql/mysql-server's supported tags to show, version 8.0 is supporting arm architecture. (https://hub.docker.com/r/mysql/mysql-server/) Lets change db's image from image: mysql:5.7 to image: mysql/mysql-server:8.0 version: '2' |
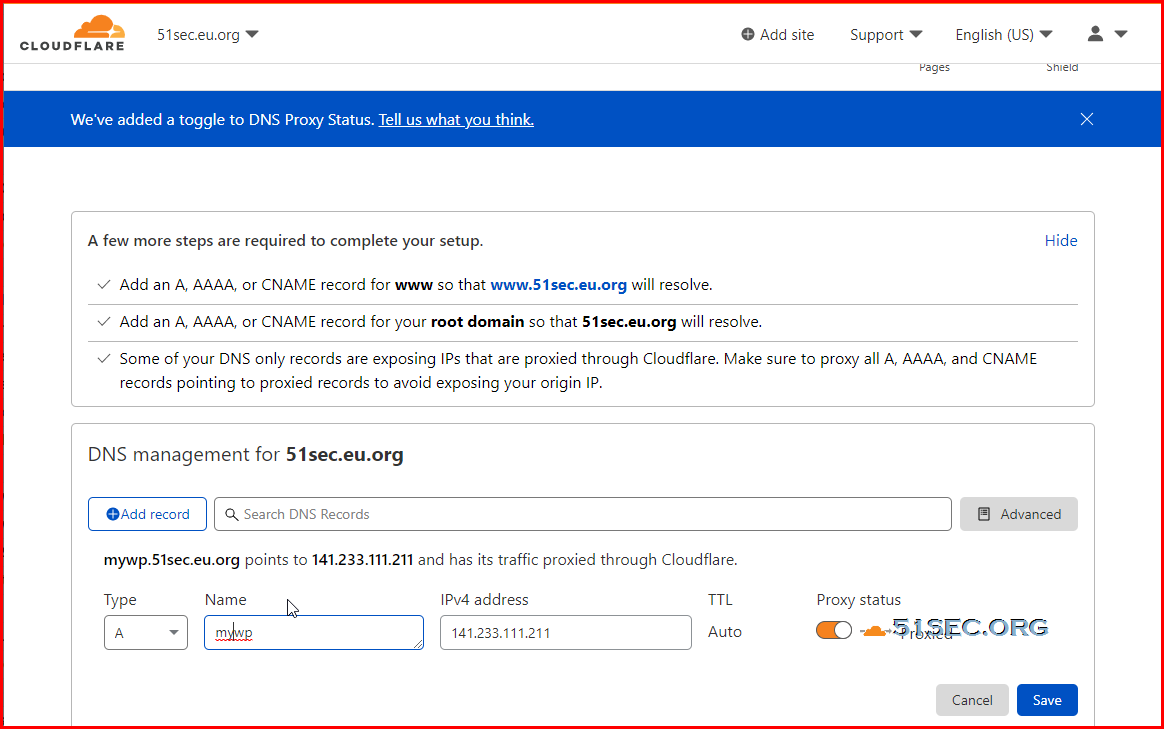
Create subdomain for your new WordPress site
This is a simple step. Based on your domain name registrar, you can find out the management panel to add a new sub domain for your new workdpress site. Here is an example from my Cloudflare page.
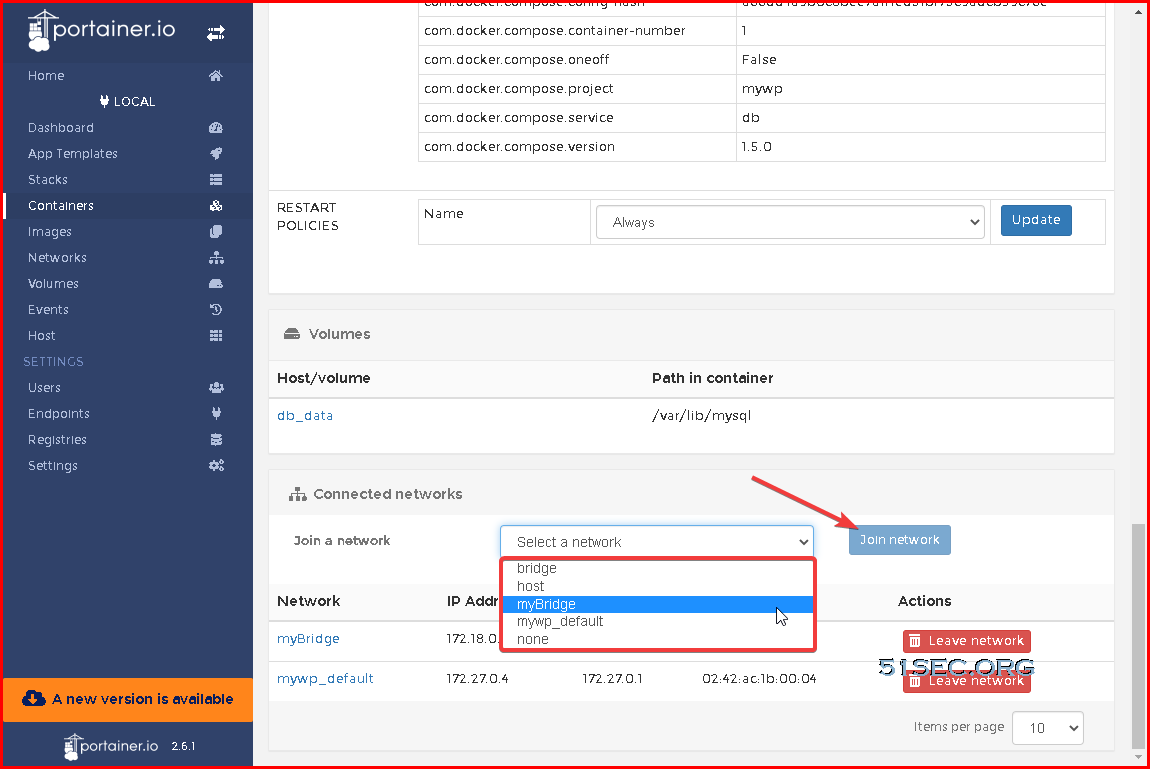
Change Docker Network
|
Previously, I have create a custom bridge network, which all of my Dockers joined in. |
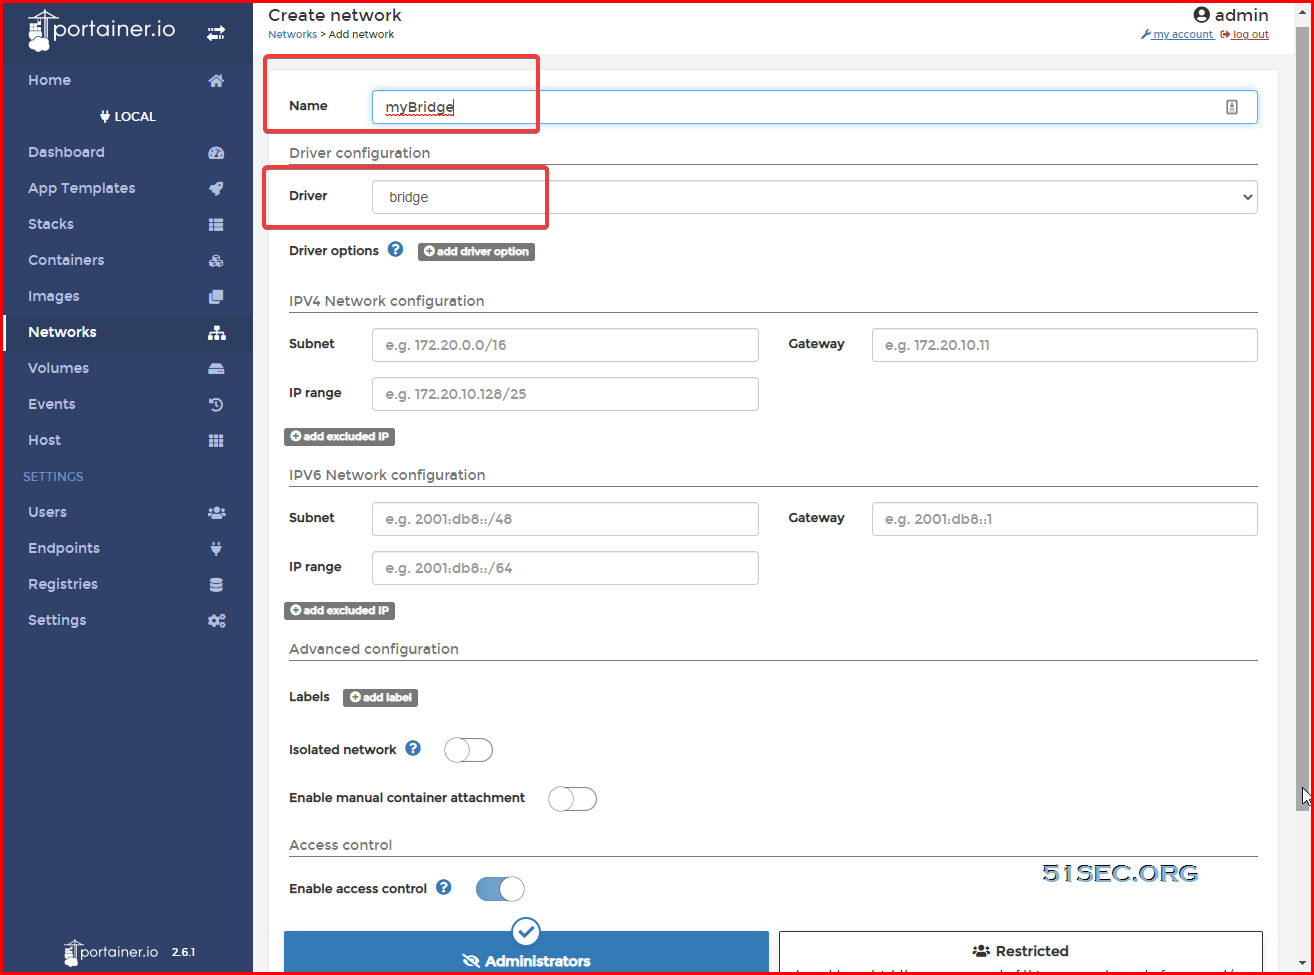
| Change WordPress dockers network to the same network as Nginx. |
Nginx Configuration
Create Nginx configuration file for WordPress site:
root@560e40a1e1d2:/etc/nginx/conf.d# cat arm1wp.conf
server {
 listen 80;
 server_name arm1wp.51sec.eu.org;

location / {
 proxy_pass http://mywp_wordpress_1;
 proxy_http_version 1.1;
 proxy_read_timeout 300;
 proxy_set_header Upgrade $http_upgrade;
 proxy_set_header Connection "upgrade";
 proxy_set_header Host $http_host;
 proxy_set_header X-Real-IP $remote_addr;
 proxy_set_header X-Real-PORT $remote_port;
 }
}
YouTube Video:
![]()
共有 0 条评论