
[5 Mins Docker] Install Open Source System and Network Monitoring Application – Nagios Core
Nagios® Core™ is an Open Source system and network monitoring application, developed for and supported by hundreds of community members. You can easily use Nagios Core to create your ideal monitoring and alerting site with a flexible and extensible monitoring architecture. Basically, Nagios watches hosts and services that you specify, alerting you when there is something happened.
For Commercial solutions, Nagios has Nagios XI, Nagios Log Server, Nagios Network Analyzer, and Nagios Fusion products.
In this post, I am gonna show you how to install your own Nagios monitoring and alerting site using Docker and directly from the installation package.
Introduction

Nagios Core 4.x : Online (HTML) Manual
System Requirements: (Nagios Core - Features.pdf)
To run Nagios Core, you’ll need a machine with the following specifications:Operating System: Linux or a UNIX variant.
- CPU: At least 1 GHz (2 GHz+ recommended).
- RAM: Minimum 512 MB (1 GB+ recommended).
- Disk Space: Minimum 500 MB (2 GB+ recommended).
- Network Access: Required.
Other related posts:
Docker - Play with Docker
Assume you already has a Docker environment ready, if not, please check next section "Self Hosted Docker Installation Pre-requirements"
1 Log into https://labs.play-with-docker.com/
2 Create an instance then paste following docker run command in
COPY: ctrl + ins
PASTE: ctrl + shift + v
docker run -d --name nagios4 -p 0.0.0.0:8080:80 jasonrivers/nagios:latest
You will need to log in with your docker hub account first then pull the image.
- docker login
$ docker run -d --name nagios4 -p 0.0.0.0:8080:80 jasonrivers/nagios:latest
Unable to find image 'jasonrivers/nagios:latest' locally
docker: Error response from daemon: toomanyrequests: You have reached your pull rate limit. You may increase the limit by authenticating and upgrading: https://www.docker.com/increase-rate-limit.
See 'docker run --help'.
[node1] (local) [email protected] ~
$ docker login
Log in with your Docker ID or email address to push and pull images from Docker Hub. If you don't have a Docker ID, head over to https://hub.docker.com/ to create one.
You can log in with your password or a Personal Access Token (PAT). Using a limited-scope PAT grants better security and is required for organizations using SSO. Learn more at https://docs.docker.com/go/access-tokens/
Username: johnyan2
Password:
WARNING! Your password will be stored unencrypted in /root/.docker/config.json.
Configure a credential helper to remove this warning. See
https://docs.docker.com/engine/reference/commandline/login/#credentials-store
Login Succeeded
[node1] (local) [email protected] ~
$
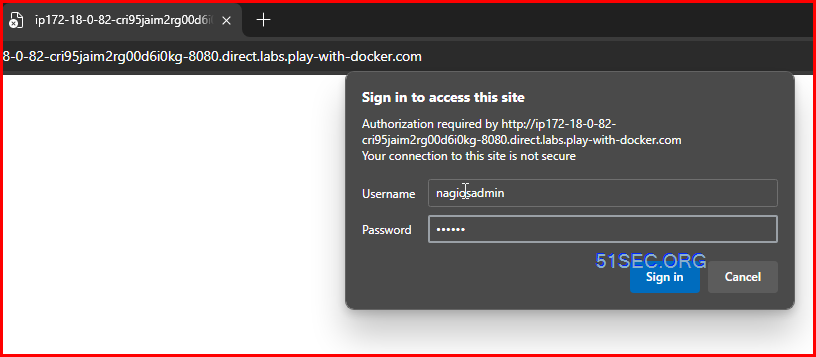
3 Browse to port 8080
The default credentials for the web interface is nagiosadmin / nagios.
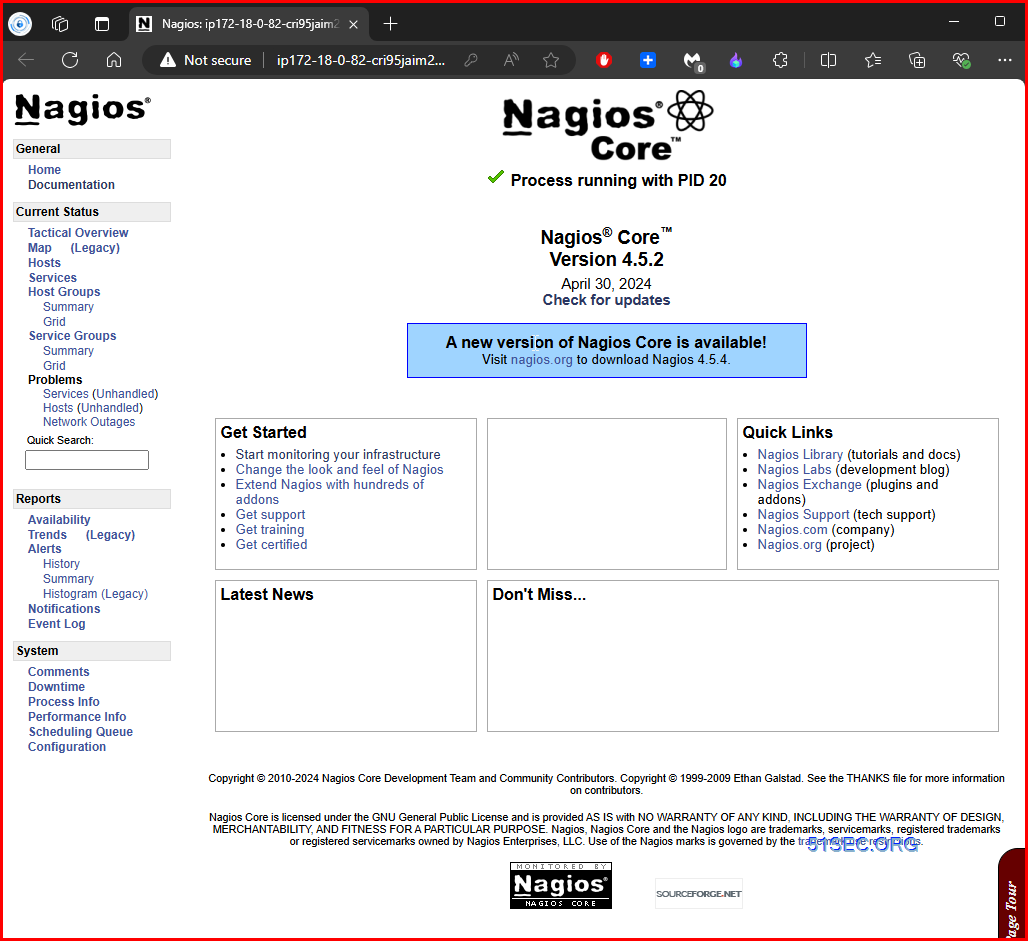
4 Web Gui
You can copy the sample content of the following directories inside the docker container to you host system docker exec -ti nagios4 /bin/bash - e.g. to the /opt directory:
- /opt/nagios/etc/
- /opt/nagios/var/
- /opt/Custom-Nagios-Plugins
- /opt/nagiosgraph/var
- /opt/nagiosgraph/etc
Modify the configuration according to your needs and mount it back into the container:
docker run --name nagios4 /
-v /opt/nagios/etc/:/opt/nagios/etc/ /
-v /opt/nagios/var:/opt/nagios/var/ /
-v /opt/Custom-Nagios-Plugins:/opt/Custom-Nagios-Plugins /
-v /opt/nagiosgraph/var:/opt/nagiosgraph/var /
-v /opt/nagiosgraph/etc:/opt/nagiosgraph/etc /
-p 0.0.0.0:8080:80 jasonrivers/nagios:latest
Self Hosted Docker Installation Pre-requirements
Free resources you might need to complete this docker project:
- Server: Oracle Free VPS, Azure Free VPS, Google Cloud Free VPS, and others
- Create a Free Tier Windows/Linux Azure VPS VM
- [Free VPS] GCP (Google Cloud Platform) Tips and Tricks (Free 16G RAM, 4 vCPU VPS)
- System: Cloud Vendor Ubuntu, Debian, or DD an original version
- SWAP size increase: wget https://raw.githubusercontent.com/51sec/swap/main/swap.sh && bash swap.sh
- Enable Password ssh login
- Enable BBR
- systemctl restart docker
- Domain: (Optional) EU.ORG to get a free one, free Cloudflare account to manage your domain
- Confirm port has not been used (you might need to install lsof using command : apt install lsof):
- lsof -i:8088
Pre-installed services:
- Docker,
- apt update
- apt install docker.io
- apt install docker-compose
- apt upgrade docker.io
- mkdir /root/data/docker_data/<docker_name>
- Docker-Compose (Using Ubuntu OS for the commands)
- Docker-compose down
- Optional command : use following command to backup your Docker data. You might need to change your folder name based on your docker configuraiton
- cp -r /root/data/docker_data/<docker_name> /root/data/docker_data_backup/<docker_name>
- docker-compose pull
- docker-compose up -d
- docker image prune
- Portainer (Optional)
- docker volume create portainer_data
- docker run -d -p 9000:9000 --name portainer --restart always -v /var/run/docker.sock:/var/run/docker.sock -v portainer_data:/data portainer/portainer-ce:latest
- Install some applications: apt install wget curl sudo vim git (Optional)
- aapanel with Nginx (Optional)
- Nginx Proxy Manager (Optional)
- Install screen (Optional)
- Install screen (Depends on the Linux Distribution if it came pre installed or not) : yum install screen
- Initiate a Screen : screen or screen -S <screen name> <command to execute>
- Detach from the screen : "CTRL+A,D" not "CTRL+A+D"
- List all the screen currently working : screen -ls
- Reattach to a screen : screen -r <session number> or screen -r <screen name>
- Kill specific screen: screen -X -S <screen name> quit
- Kill all screens : pkill screen
Monitoring Usage, especially for disk usage
- Docker stats
- ncdu
- apt install ncdu
Remove Docker and Related folders
- docker stop <Docker Name> # stop the docker but not remove anything.
- docker rm -f <Docker Name> # remove speficic container, but will not delete mapped volumes
- rm -rf /root/data/docker_data/<Docker Mapped Volumns> # remove all mapped volumes
Restrick Journal Log File Size:
- journalctl --vacuum-size=100M
- Limit it to 25M:
nano /etc/systemd/journald.conf
SystemMaxUse=25M
systemctl restart systemd-journald.service
sudo bash -c 'echo "SystemMaxUse=100M" >> /etc/systemd/journald.conf' sudo systemctl restart systemd-journaldEnable IPv6 and Limit Log File Size (Ubuntu)
sudo sh -c 'truncate -s 0 /var/lib/docker/containers/*/*-json.log'
cat > /etc/docker/daemon.json << EOF { "log-driver": "json-file", "log-opts": { "max-size": "20m", "max-file": "3" }, "ipv6": true, "fixed-cidr-v6": "fd00:dead:beef:c0::/80", "eixperimental":true, "ip6tables":true } EOFIf there is any error, or IPv6 part might not work in the platform you might want to change it to list:
cat <<EOF > /etc/docker/daemon.json { "live-restore": true, "storage-driver": "overlay2", "log-opts": { "max-size": "10m" } } EOF
systemctl restart dockerLimit number of log files:
cat /etc/logrotate.d/rsyslog /var/log/syslog /var/log/mail.info /var/log/mail.warn /var/log/mail.err /var/log/mail.log /var/log/daemon.log /var/log/kern.log /var/log/auth.log /var/log/user.log /var/log/lpr.log /var/log/cron.log /var/log/debug /var/log/messages { rotate 4 weekly missingok notifempty compress delaycompress sharedscripts postrotate /usr/lib/rsyslog/rsyslog-rotate endscript } You can change 4 to some other value, such as 1, so that only one file is stored.
Add a new host with services to monitor
1 Log into docker:
- docker exec -ti nagios4 /bin/bash
2 Open up: /opt/nagios/etc/nagios.cfg and add a new cfg_dir:
cfg_dir=/opt/nagios/etc/servers
3 Create the directory
mkdir /opt/nagios/etc/servers
4 edit configuration file to add new host in with ping / http services
nano /opt/nagios/etc/servers/servers.cfg
You might want to run following commands to install nano first:
- apt update -y
- apt install nano -y
5 We are using the linux-server template that is defined in /opt/nagios/etc/objects/templates.cfg
define host { use linux-server host_name DNS01 alias DNS01 address 8.8.8.8 max_check_attempts 5 check_period 24x7 notification_interval 30 notification_period 24x7 } define service { use generic-service host_name DNS01 service_description PING check_command check_ping!100.0,20%!500.0,60% } define service { use generic-service host_name DNS01 service_description SSH check_command check_ssh notifications_enabled 1 } define service { use generic-service host_name DNS01 service_description HTTP check_command check_http notifications_enabled 1 }
nagios -v /opt/nagios/etc/nagios.cfg
Docker restart nagios4
Manual install Nagios
sudo apt-get update
sudo apt-get install -y autoconf gcc libc6 make wget unzip apache2 php libapache2-mod-php7.4 libgd-dev
sudo apt-get install openssl libssl-dev
Donload Nagios Core
cd /tmp
wget -O nagioscore.tar.gz https://github.com/NagiosEnterprises/nagioscore/archive/nagios-4.4.14.tar.gz
tar xzf nagioscore.tar.gz
Check the releases page for latest Nagios available.
NAGIOS_VER=$(curl -s https://api.github.com/repos/NagiosEnterprises/nagioscore/releases/latest|grep tag_name|cut -d '"' -f 4) curl -SL https://github.com/NagiosEnterprises/nagioscore/releases/download/$NAGIOS_VER/$NAGIOS_VER.tar.gz | tar -xzf -The command will download and extract the Nagios core archive to your current working directory.
Compile
Change to created Nagios folder.
cd $NAGIOS_VERcd /tmp/nagioscore-nagios-4.4.14/
sudo ./configure --with-httpd-conf=/etc/apache2/sites-enabled
sudo make all
Create User And Group
This creates the nagios user and group. The www-data user is also added to the nagios group.
sudo make install-groups-users
sudo usermod -a -G nagios www-data
Install Binaries
This step installs the binary files, CGIs, and HTML files.
sudo make install
Install Service / Daemon
This installs the service or daemon files and also configures them to start on boot.
sudo make install-daemoninit
Information on starting and stopping services will be explained further on.
Install Command Mode
This installs and configures the external command file.
sudo make install-commandmode
Install Configuration Files
This installs the *SAMPLE* configuration files. These are required as Nagios needs some configuration files to allow it to start.
sudo make install-config
Install Apache Config Files
This installs the Apache web server configuration files and configures Apache settings.
sudo make install-webconf
sudo a2enmod rewrite
sudo a2enmod cgi
Install the Exfoliation theme for the Nagios web interface.
sudo make install-exfoliationIf you want to use classic Nagios theme, run:
make install-classicuiCreate Nagios Web User
A user is required for the access to Nagios web console.
$ sudo htpasswd -c /usr/local/nagios/etc/htpasswd.users nagiosadmin New password: Re-type new password: Adding password for user nagiosadmin
The htpasswd has been used to generate the password and write it to the /usr/local/nagios/etc/htpasswd.users file.
Install Nagios Plugins
Nagios plugins are used to extend Nagios monitoring features. Let’s ensure they are installed. Check for the latest release of Nagios plugins from Github releases page.
cd ~/ VER=$( curl -s https://api.github.com/repos/nagios-plugins/nagios-plugins/releases/latest|grep tag_name|cut -d '"' -f 4|sed 's/release-//') curl -SL https://github.com/nagios-plugins/nagios-plugins/releases/download/release-$VER/nagios-plugins-$VER.tar.gz | tar -xzf -Change to the plugins source directory:
cd nagios-plugins-$VERCompile and install Nagios plugins by running commands below.
./configure --with-nagios-user=nagios --with-nagios-group=nagios make sudo make installVerify installation and start service
Confirm that your Nagios installation was successful on Ubuntu Linux machine.
sudo /usr/local/nagios/bin/nagios -v /usr/local/nagios/etc/nagios.cfgStart and enable nagios service to start at boot.
sudo systemctl enable --now nagiosVideo
References
- How to install Nagios Core on Docker
- Monitor your First Host and Services with Nagios
- https://computingforgeeks.com/install-and-configure-nagios-on-ubuntu-linux/
共有 0 条评论