
RDP Connect to Your Github Action VM Free for 6 Hours
GitHub offers hosted virtual machines to run workflows, which contains an environment of tools, packages, and settings available for GitHub Actions to use. It also allows you install additional software on GitHub-hosted runners (Github hosted Action VM) as a part of your workflow. That gives us a chance to install enable RDP on a Windows server and use Ngrok to proivde us a port for our RDP connection.
This post shows you how to configure this Github VM and how to RDP into it.
More information about Github-hosted runners:
Runners are the machines that execute jobs in a GitHub Actions workflow. For example, a runner can clone your repository locally, install testing software, and then run commands that evaluate your code. GitHub provides runners that you can use to run your jobs, or you can host your own runners. Each GitHub-hosted runner is a new virtual machine (VM) hosted by GitHub with the runner application and other tools preinstalled, and is available with Ubuntu Linux, Windows, or macOS operating systems. When you use a GitHub-hosted runner, machine maintenance and upgrades are taken care of for you.Further details can be found from : https://docs.github.com/en/actions/using-github-hosted-runners/about-github-hosted-runners/about-github-hosted-runners
Pre-requisites
Requirements:
1. Github Account2. Ngrok Account
Limitation:
Steps
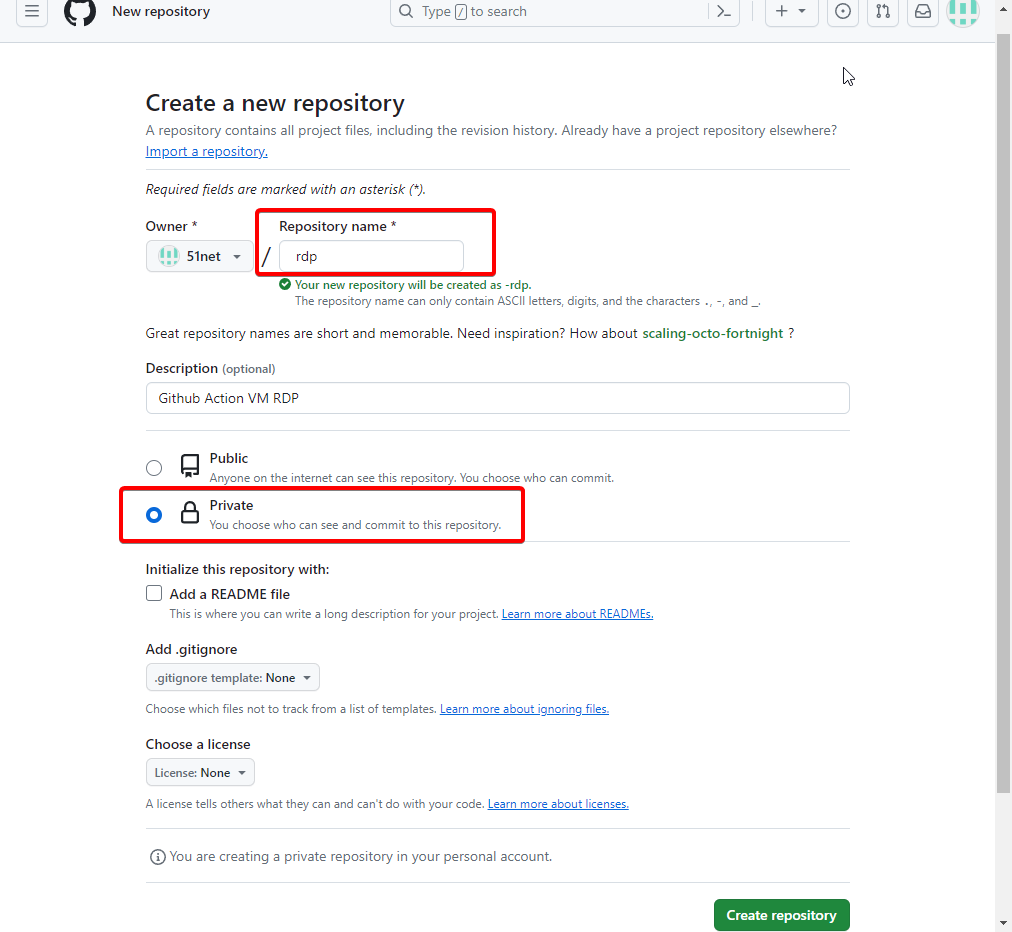
1 Create a new Github Repository
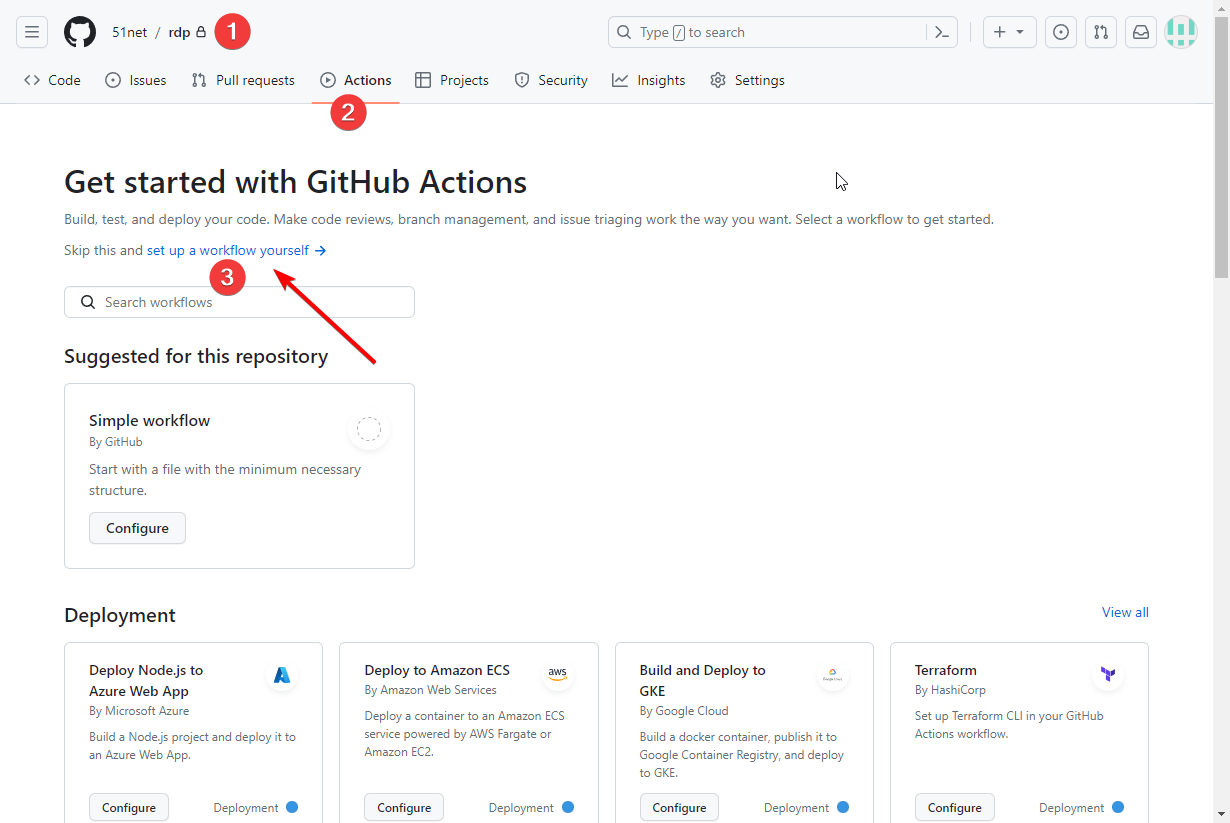
2 Set up a wrokflow yourself
3 Paste the code in to new workflows / main.yml file then Commit changes...
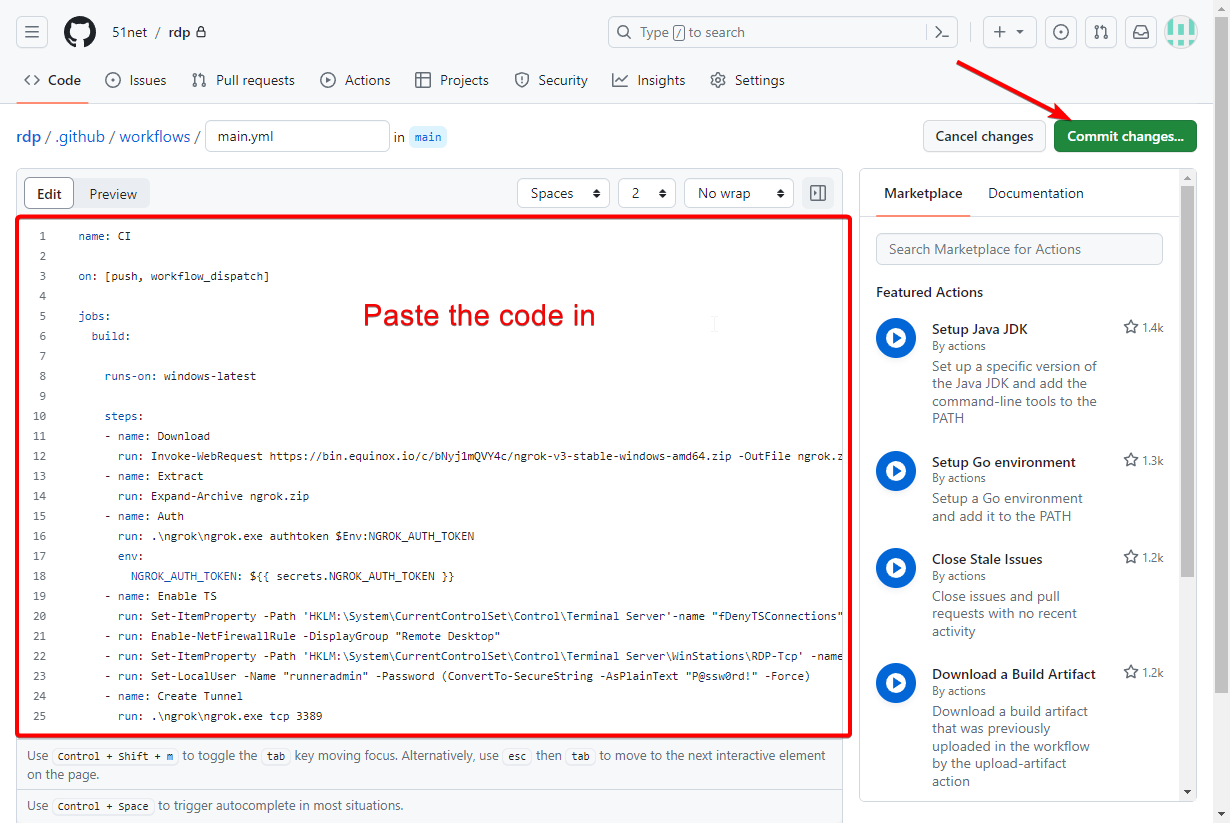
name: CI
on: [push, workflow_dispatch]
jobs:
build:
runs-on: windows-latest
steps:
- name: Download
run: Invoke-WebRequest https://bin.equinox.io/c/bNyj1mQVY4c/ngrok-v3-stable-windows-amd64.zip -OutFile ngrok.zip
- name: Extract
run: Expand-Archive ngrok.zip
- name: Auth
run: ./ngrok/ngrok.exe authtoken $Env:NGROK_AUTH_TOKEN
env:
NGROK_AUTH_TOKEN: ${{ secrets.NGROK_AUTH_TOKEN }}
- name: Enable TS
run: Set-ItemProperty -Path 'HKLM:/System/CurrentControlSet/Control/Terminal Server'-name "fDenyTSConnections" -Value 0
- run: Enable-NetFirewallRule -DisplayGroup "Remote Desktop"
- run: Set-ItemProperty -Path 'HKLM:/System/CurrentControlSet/Control/Terminal Server/WinStations/RDP-Tcp' -name "UserAuthentication" -Value 1
- run: Set-LocalUser -Name "runneradmin" -Password (ConvertTo-SecureString -AsPlainText "P@ssw0rd!" -Force)
- name: Create Tunnel
run: ./ngrok/ngrok.exe tcp 3389
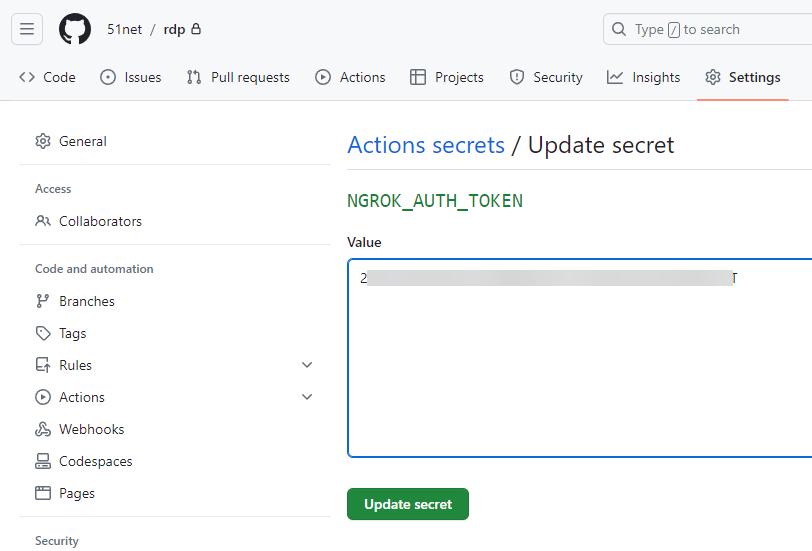
4 Click Settings - Security - Secrets and variables - Actions - New repository secret
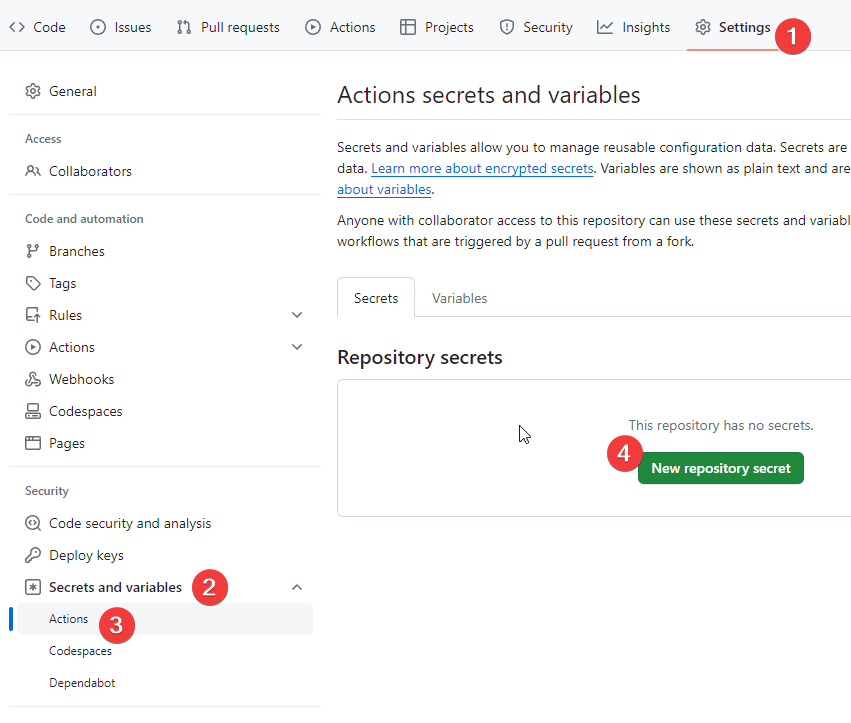
Add a new repository secret
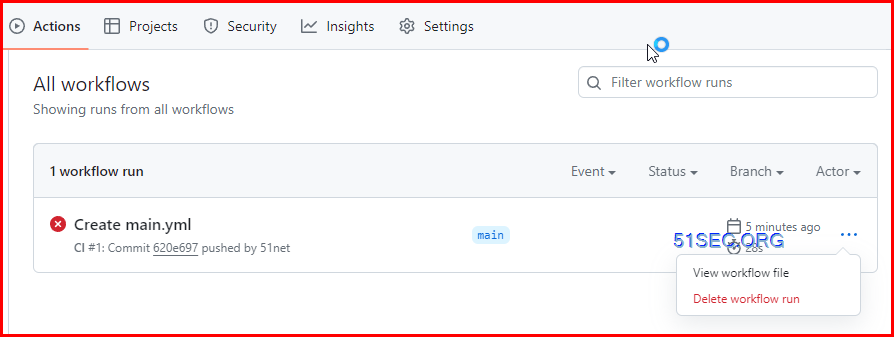
5 Delete the failed workflow run
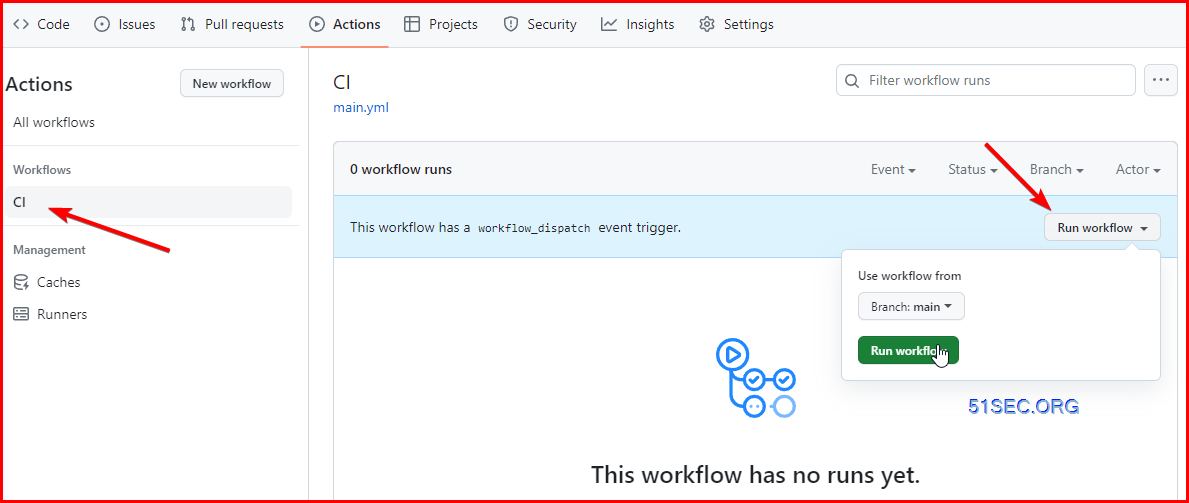
6 Run CI workflow
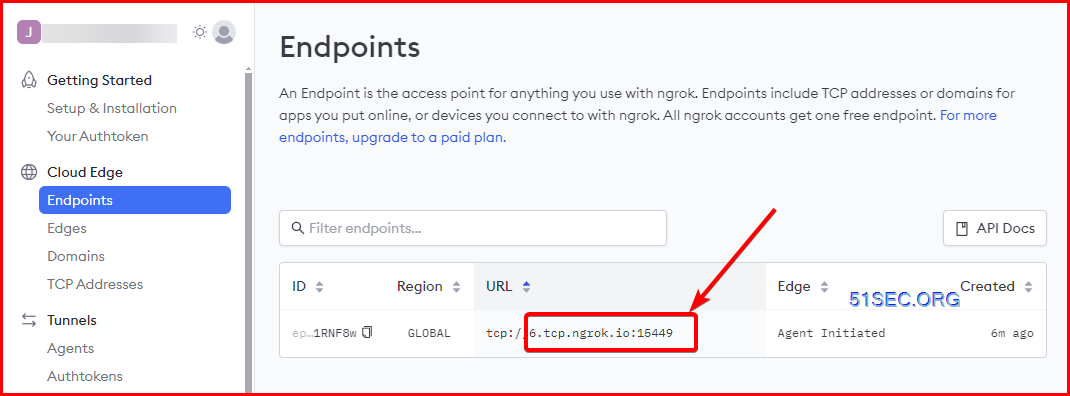
7 Go back to Ngrok webpage and find out Endpoint's URL
in this example, copy 6.tcp.ngrok.io:16449 , and it will be used as our RDP host value.
8 RDP into your new Windows Server
username: runneradmin
password: P@ssw0rd!

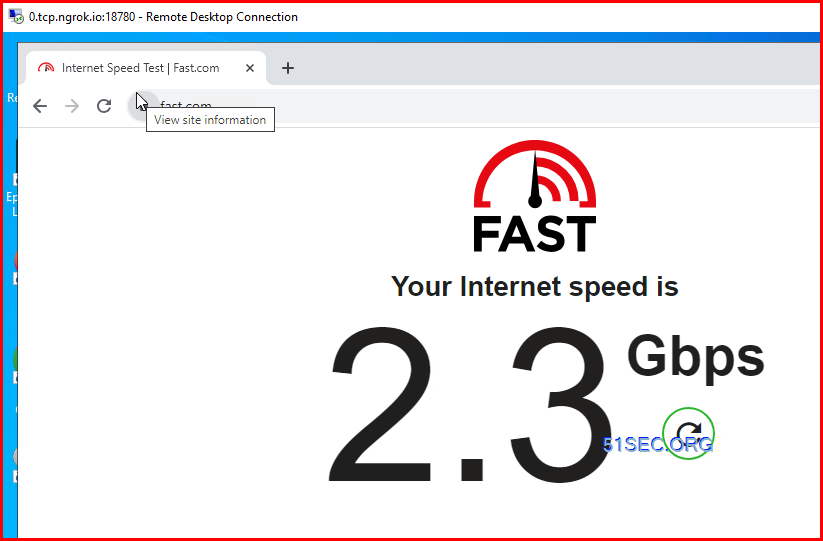
Speed testing:
Videos
References
- Google chrome Remote Desktop - https://remotedesktop.google.com/
- tmate Instant terminal sharing - https://tmate.io/
- ngrok | Unified Application Delivery Platform for Developers - https://ngrok.com/
- https://github.com/HowToLearnHacking/uploads/blob/main/file.txt
- https://github.com/yrifl/synvm
- https://www.youtube.com/watch?v=PXYzpi6dfns
- https://www.youtube.com/watch?v=oxTv8EUEiZE
- https://github.com/Har-Kuun/OneClickDesktop
共有 0 条评论