
Microsoft Intune Deploy Guide and Device Onboarding Process
Microsoft Intune, together with Microsoft Entra ID, facilitates a secure, streamlined process for registering and enrolling devices that want access to your internal resources. Once users and devices are registered within your Microsoft Entra ID (also called a tenant), then you can utilize Intune for its endpoint management capabilities. The process that enables device management for a device is called device enrollment.
A successful Microsoft Intune deployment or migration starts with planning. This guide helps you plan your move or adoption of Intune as your unified endpoint management solution.

Overview
- Enrollment policies that limit the number or type of devices someone can enroll.
- Compliance policies that help users and devices meet your rules.
- Configuration profiles that configure work-appropriate features and settings on devices.

Typically, policies are deployed during enrollment. Some groups, depending on their roles in your organization, can require stricter policies than others. Many organizations start by creating a baseline of required policies for users and devices. Then, add to this baseline as needed for different groups and use cases.
Minimum recommended baseline policies:
- Step 1 - Set up Intune subscription
- Step 2 - Add, configure, and protect apps
- Step 3 - Create compliance policies
- Step 4 - Configure device features and security settings
- Step 5 - Enroll devices
Step 1 - Set up Intune subscription
Step 2 - Add, configure, and protect apps
Step 3 – Plan for compliance policies
Next, plan for and configure device compliance settings and policies to help protect organizational data by requiring devices to meet requirements that you set.
You deploy compliance policies to groups of devices or users. When deployed to users, any device the user signs into must then meet the policies requirements. Some common examples of compliance requirements include:
- Requiring a minimum operating system version.
- Use of a password or PIN that meets certain complexity and length requirements.
- A device being at or below a threat level as determined by mobile threat defense software you use. Mobile threat defense software includes Microsoft Defender for Endpoint or one of Intune’s other supported partners.
Step 4 - Configure device features and settings to secure devices and access resources
In this step, you're ready to configure a minimum or baseline set of security and device features that all devices must have.
Step 5 – Enroll devices in Microsoft Intune
In the final phase of deployment, devices are registered or joined in Microsoft Entra ID, enrolled in Microsoft Intune, and checked for compliance.
Automatic Enrollment
Configure Windows devices to enroll when they join or register with Azure Active Directory.
Make enrollment in Intune easier for employees and students by enabling automatic enrollment for Windows. For more information, see Enable automatic enrollment.
-
Microsoft Entra join with automatic enrollment: This option is supported on devices that are procured by you or the device user for work use. Enrollment occurs during the out-of-box-experience, after the user signs in with their work account and joins Microsoft Entra ID or by choosing to join the device in Microsoft Entra ID when connecting a work or school account from the Settings app (as described in Windows device enrollment guide - End user tasks). This solution is for when you don't have access to the device, such as in remote work environments. When these devices enroll, their device ownership changes to corporate-owned and you get access to management features that aren't available on devices marked as personal-owned.
-
Windows Autopilot user-driven or self-deploying mode: Automatic enrollment is supported with the Windows Autopilot user-driven (for both the Microsoft Entra hybrid join and Microsoft Entra join scenarios) or self-deploying (Microsoft Entra join only) profiles and can be used for corporate-owned desktops, laptops, and kiosks. Device users get desktop access after required software and policies are installed. A Microsoft Entra ID P1 or P2 license is required. We recommend using only Microsoft Entra join, which provides the best user experience and is easier to configure. In scenarios where on-premises Active Directory is still needed, Microsoft Entra hybrid join can be used but you have to install the Intune connector for Active Directory, and your devices must be able to connect to a domain controller via either an on-premises network or VPN connection.
-
Co-management with Configuration Manager: Co-management is best for environments that already manage devices with Configuration Manager, and want to integrate Microsoft Intune workloads. Co-management is the act of moving workloads from Configuration Manager to Intune and telling the Windows client who the management authority is for that particular workload. For example, you can manage devices with compliance policies and device configuration workloads in Intune, and utilize Configuration Manager for all other features, like app deployment and security policies.
-
Enrollment using Group Policy: A Group Policy can be used to trigger the automatic enrollment of Microsoft Entra hybrid joined devices without any user interaction. The enrollment process starts in the background (via a scheduled task) after a Microsoft Entra ID-synced user signs in on the device. We recommend this method in environments where devices are Microsoft Entra hybrid joined and not managed using Configuration Manager.
Onboard A Windows Device into InTune
1 Settings - Access work or school
Join this device to Microsoft Entra ID
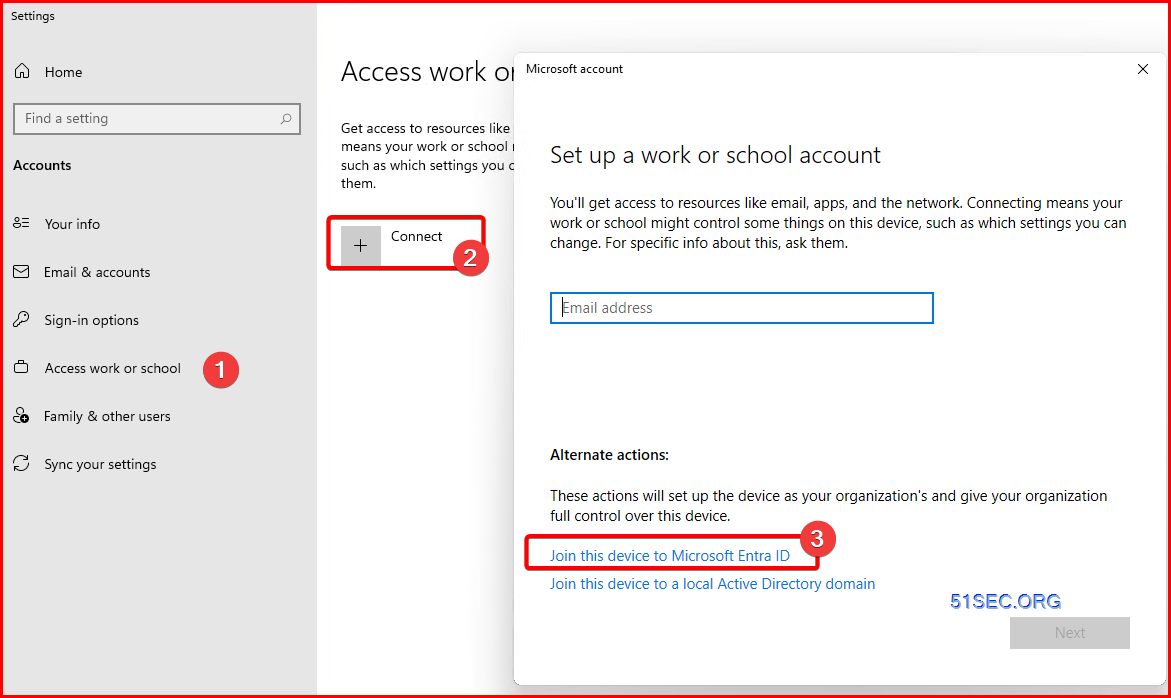
2 Login with your Entra ID

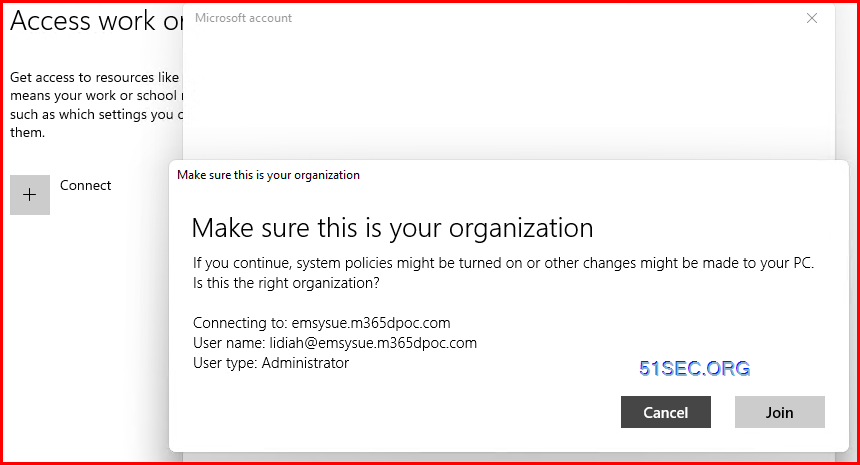
Make sure this is your organization then join:
Once done, you will get a message to ask you switch account:
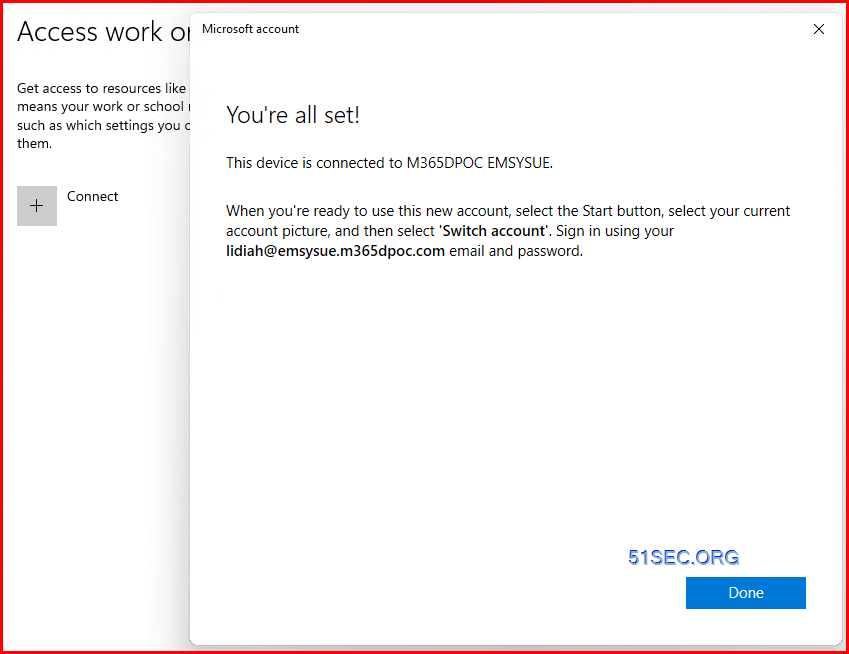
3 Switch Account to log in

Switch user
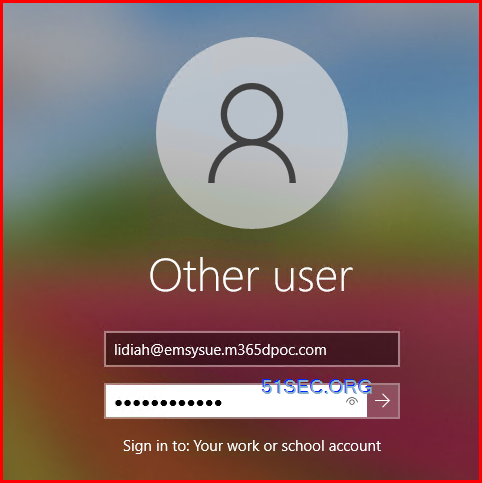
4 Onboard Account
Videos
References
$AzureAdCred = Get-Credential Connect-AzureAD -Credential $AzureAdCred[netsec@centos1docker hihttps]$ netstat -lntp | grep 80 (No info could be read for "-p": geteuid()=1000 but you should be root.) tcp 0 0 0.0.0.0:80 0.0.0.0:* LISTEN - [netsec@centos1docker hihttps]$
root@4ccb3643b7e4:/# cat /etc/nginx/conf.d/wp.conf server { listen 80; server_name opc2armwp.51sec.eu.org 51sec.org www.51sec.org; }
set_chinese_lang
apt-get autoremove -y
echo "Install Done!"
echo "Now you can reboot and connect port 3389 with rdp client"
echo "Note: chromium-browser is not displayed on the desktop, please start it manually if necessary"
echo "Default Username: rdpuser"
echo "Default Password: rdpuser_password"
版权声明:
作者:zhangchen
链接:https://www.techfm.club/p/163222.html
来源:TechFM
文章版权归作者所有,未经允许请勿转载。
共有 0 条评论