
Tailscale VPN Configuration Including Exit Node in 5 Minutes
Tailscale is a modern VPN solution that simplifies secure networking by creating private, encrypted connections between devices, no matter where they are located. Built on the WireGuard protocol, Tailscale enables seamless access to your network, allowing remote teams to connect easily and securely. Unlike traditional VPNs, Tailscale doesn’t require complex configurations or management, offering a user-friendly interface for creating and managing secure connections with minimal hassle. Its ability to automatically handle NAT traversal and device authentication makes it an ideal choice for remote work and distributed systems.
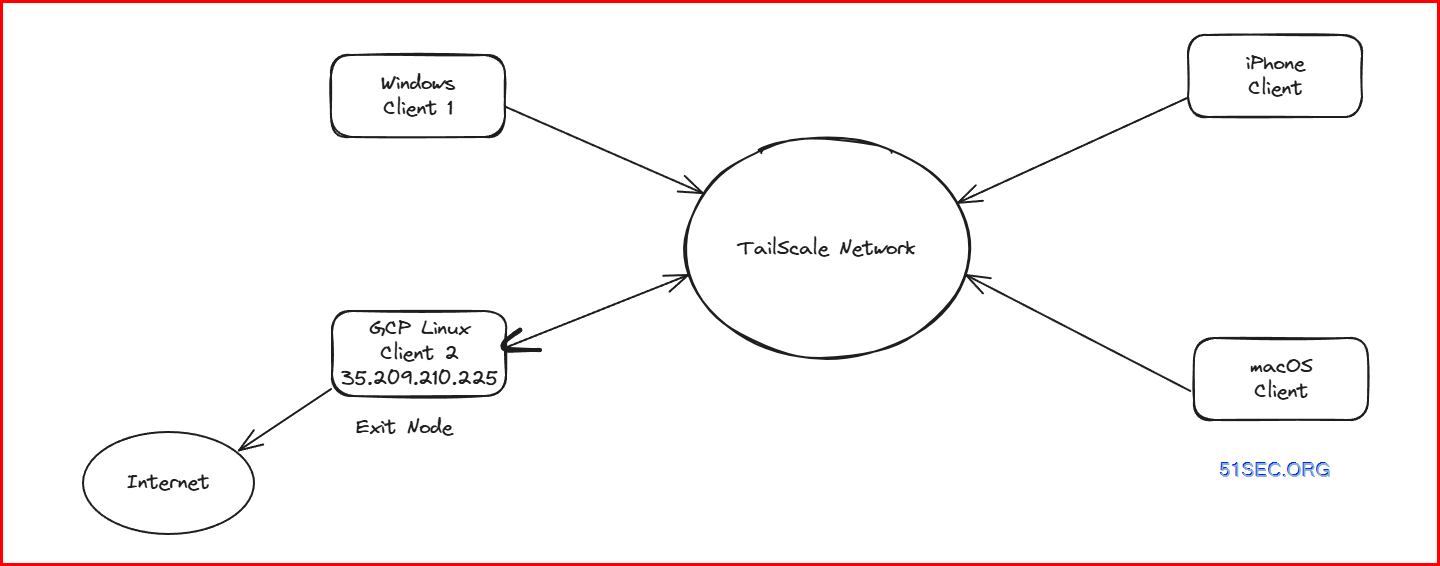
In this blog post, I am going to show you how to install this modem mesh VPN network for your home lab and how you can use exit node to route all traffic through your exit node in this Tailscale vpn network.
Tailscale
Tailscale is a mesh VPN (Virtual Private Network) service that streamlines connecting devices and services securely across different networks. It enables encrypted point-to-point connections using the open source WireGuard protocol, which means only devices on your private network can communicate with each other.
Unlike traditional VPNs, which tunnel all network traffic through a central gateway server, Tailscale creates a peer-to-peer mesh network (known as a tailnet). However, you can still use Tailscale like a traditional VPN by routing all traffic through an exit node.
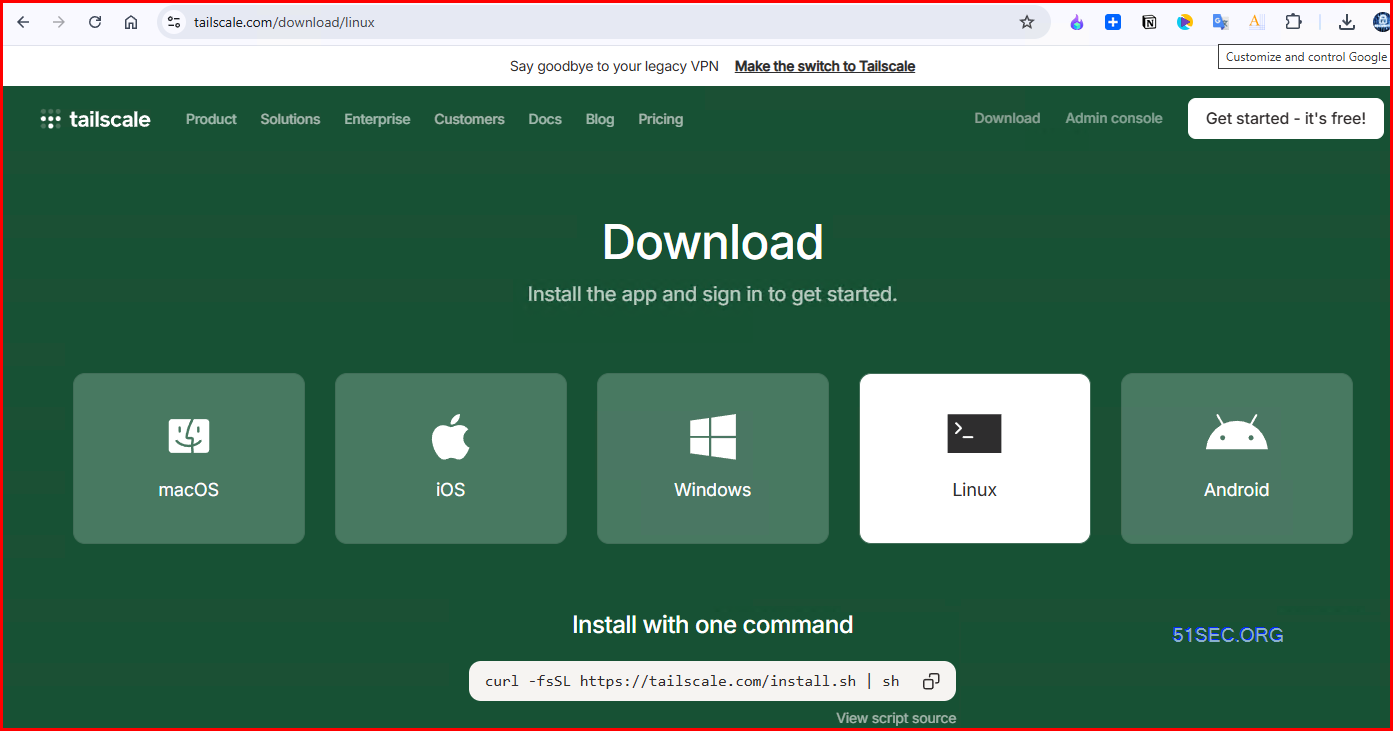
Download link: https://tailscale.com/download
Tailscale uses the WireGuard protocol for secure, peer-to-peer encrypted communication between devices. WireGuard is known for its simplicity, speed, and strong security.
As for the ports, Tailscale primarily uses:
- UDP port 51820: This is the default port used by the WireGuard protocol for direct device-to-device communication.
Additionally, Tailscale may fall back to using other ports if the default port is blocked, relying on:
- UDP port 443 (commonly used for HTTPS traffic)
- TCP port 443: Used for NAT traversal in cases where devices cannot directly reach each other over UDP (e.g., when behind restrictive firewalls or NATs).
These fallback ports help ensure that Tailscale can establish a connection even when strict network conditions are in place.
Diagram
Here’s a general topology diagram for Tailscale:
- Nodes (Devices): Show different devices like laptops, servers, cloud VMs, and mobile phones connected via Tailscale.
- Tailscale Coordination Server: Represent the central Tailscale coordination server, which helps establish peer-to-peer connections.
- Peer-to-Peer Mesh: Indicate direct encrypted communication between devices (e.g., through WireGuard) without traffic passing through a central server.
- Exit Nodes & Subnet Routers: Optionally show an exit node for internet traffic and a subnet router for accessing a private network.

Tailscale Installation on Linux
Installation on Linux
root@u-tailscale:~# curl -fsSL https://tailscale.com/install.sh | sh
root@ubuntu-tailscale-exit-node:~# tailscale up To authenticate, visit: https://login.tailscale.com/a/1274d38501e339 Success. root@ubuntu-tailscale-exit-node:~#
Open your browser to log in with generated login url from command line.
root@ubuntu-tailscale-exit-node:~# tailscale ip -4 100.104.248.81 root@ubuntu-tailscale-exit-node:~#
Note: For Ubuntu 24.04, the installation guide is at https://tailscale.com/kb/1481/install-ubuntu-2410
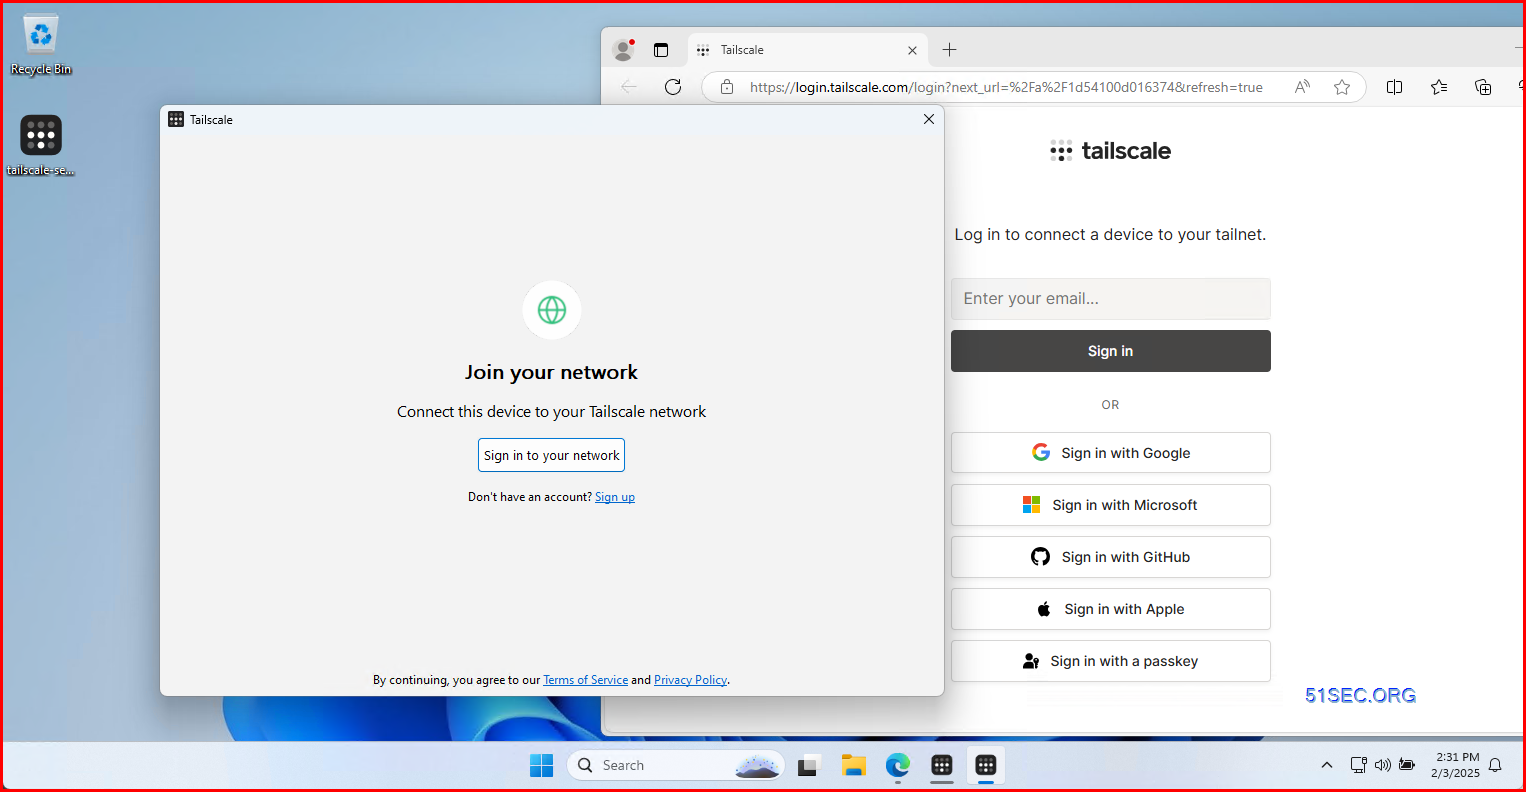
Tailscale Installation on Windows
Installation on Windows:
Configure Exit Node for your Tailscale VPN Network
Overlay Network
Exit Nodes
The exit node feature lets you route all traffic through a specific device on your Tailscale network (known as a tailnet). The device routing your traffic is called an exit node. There are many ways to use exit nodes in a tailnet. For example, you can:
- Route all non-Tailscale traffic through an exit node.
- Use suggested exit nodes to automatically use the best exit node based on client information, such as location and latency.
- Force devices to use an exit node based on system policies, which you can deploy using mobile device management (MDM) solutions.
For security purposes, you must opt in to exit node functionality. For example:
- Every device must explicitly opt in to using an exit node.
- A device must advertise itself as an exit node.
- An Owner, Admin, or Network admin must allow a device to be an exit node for the tailnet.
1 Understand the prerequisites.
If your tailnet is using the default ACL, users of your tailnet already have access to any exit nodes that you configure.
2 Configure a device to act as an exit node.
- Install the Tailscale client.
- Download and install Tailscale onto the Linux device you plan to use as an exit node.
- Advertise the device as an exit node
-
Warning: IP forwarding is disabled, subnet routing/exit nodes will not work.
See https://tailscale.com/s/ip-forwarding
-
Warning: UDP GRO forwarding is suboptimally configured on ens4, UDP forwarding throughput capability will increase with a configuration change.
See https://tailscale.com/s/ethtool-config-udp-gro
-
From the device you plan to use as an exit node, use the
--advertise-exit-nodeflag when you runtailscale setortailscale up:If you pass the
--advertise-exit-nodeflag to thetailscale setcommand, you must runtailscale upafterward.
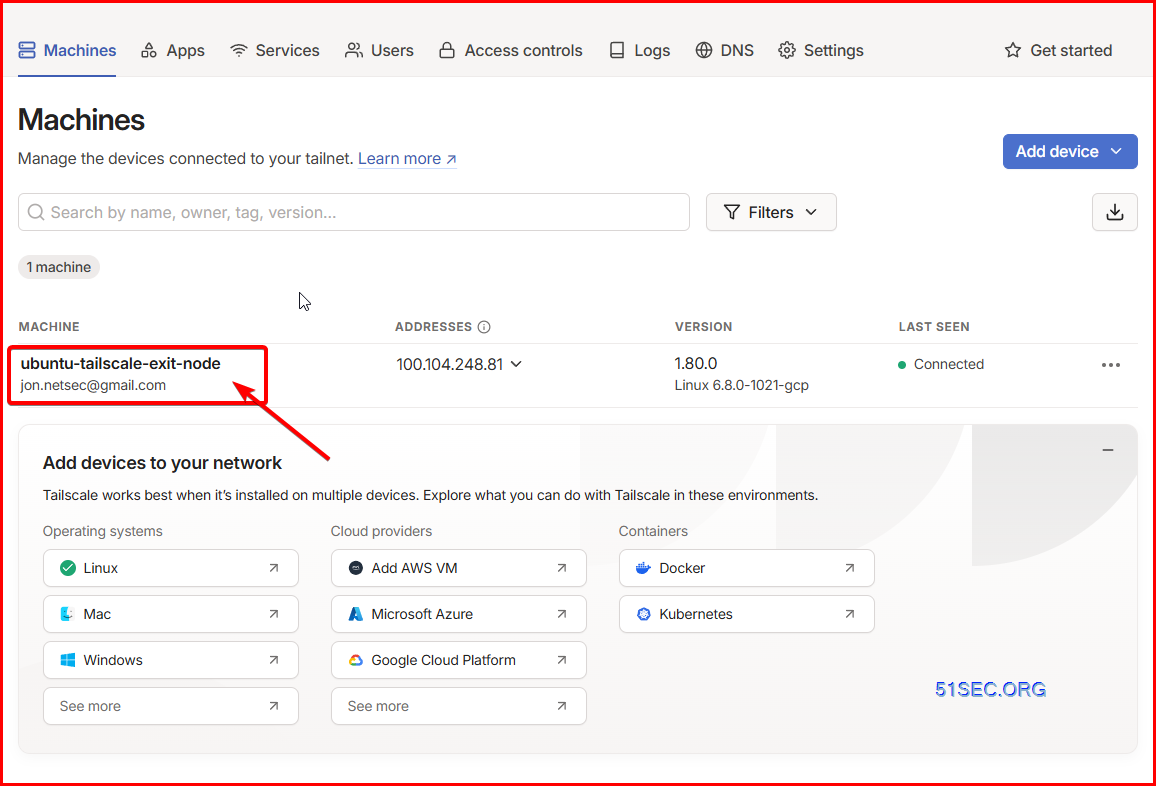
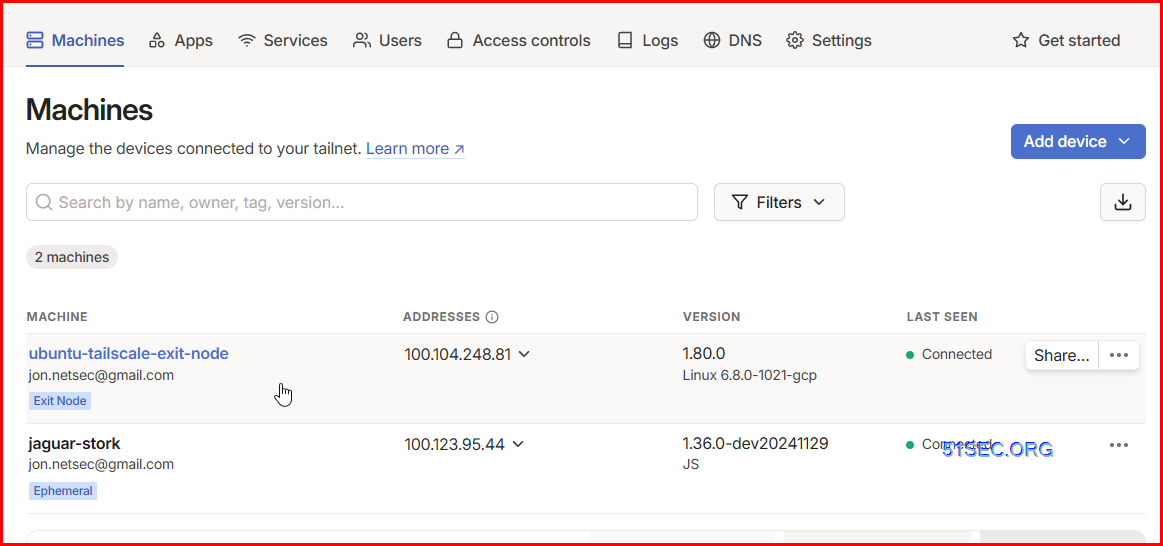
3 Allow the exit node from the admin console.
- Approve it from console
-
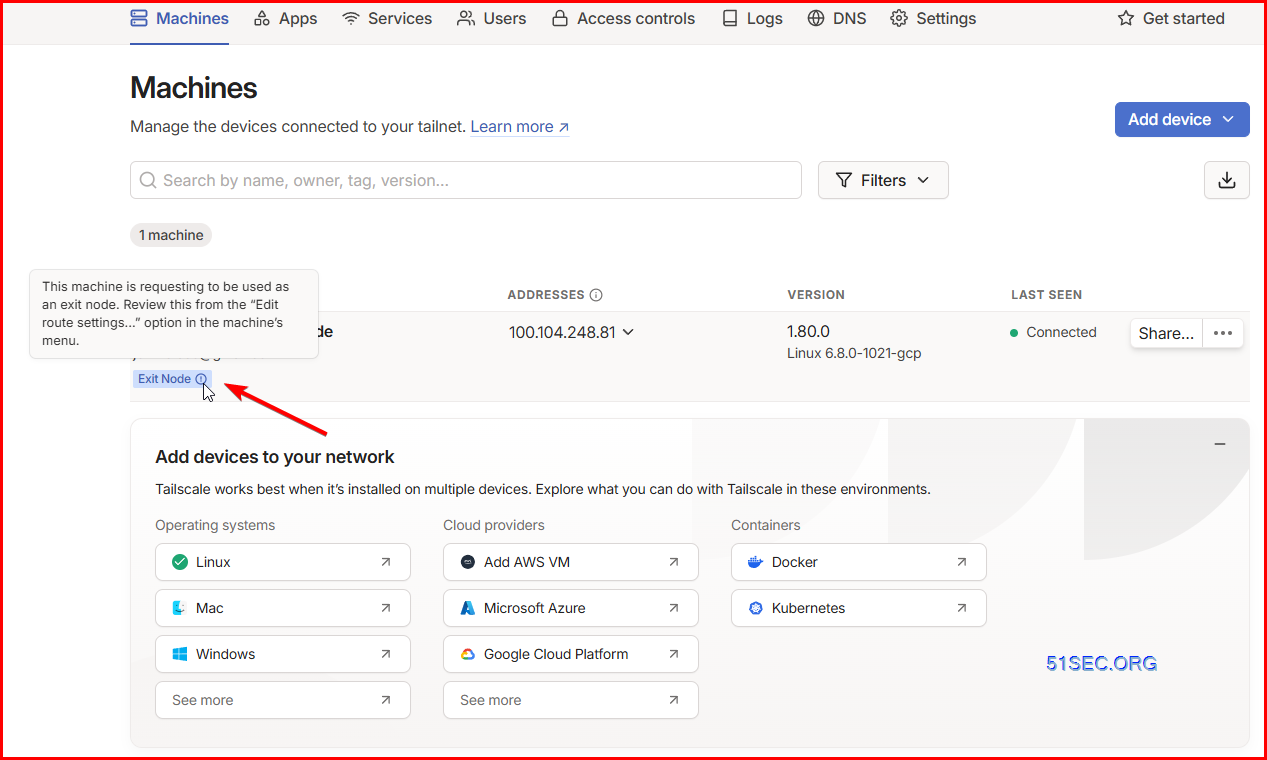
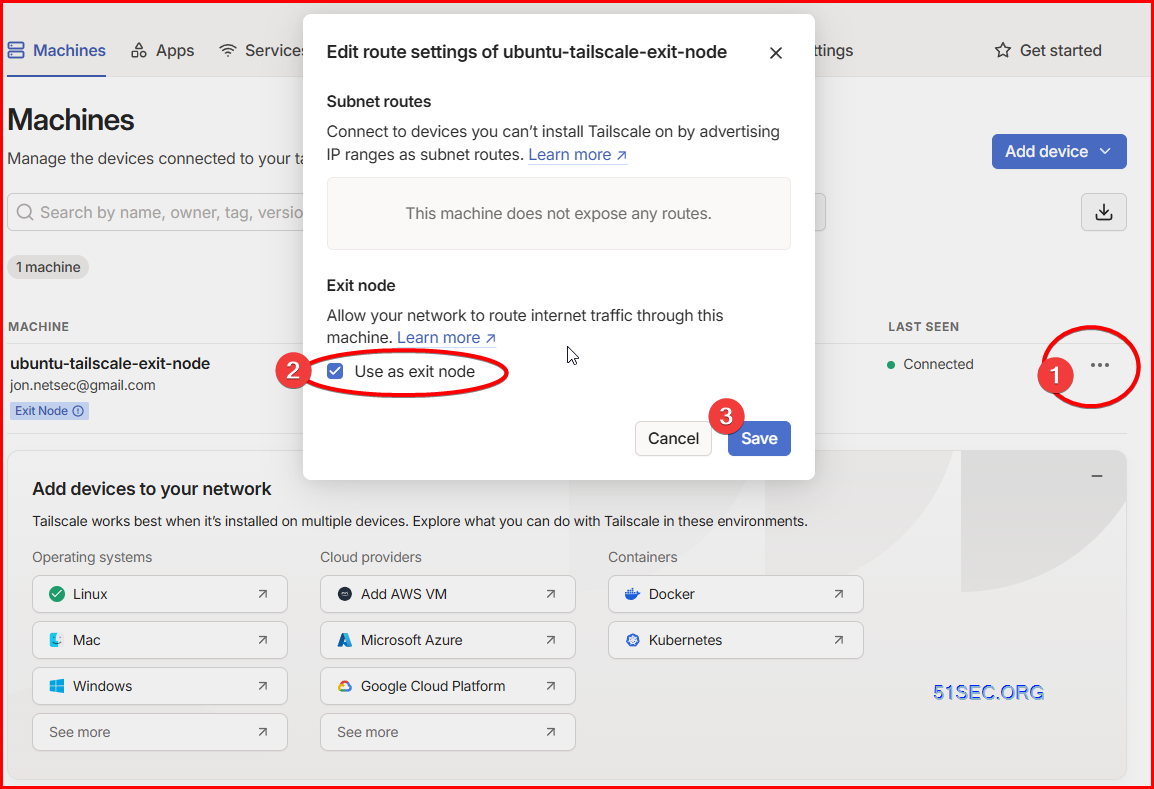
The machine is set as Exit node now.
4 Configure other devices to use the exit node.
- Use the exit node.
-
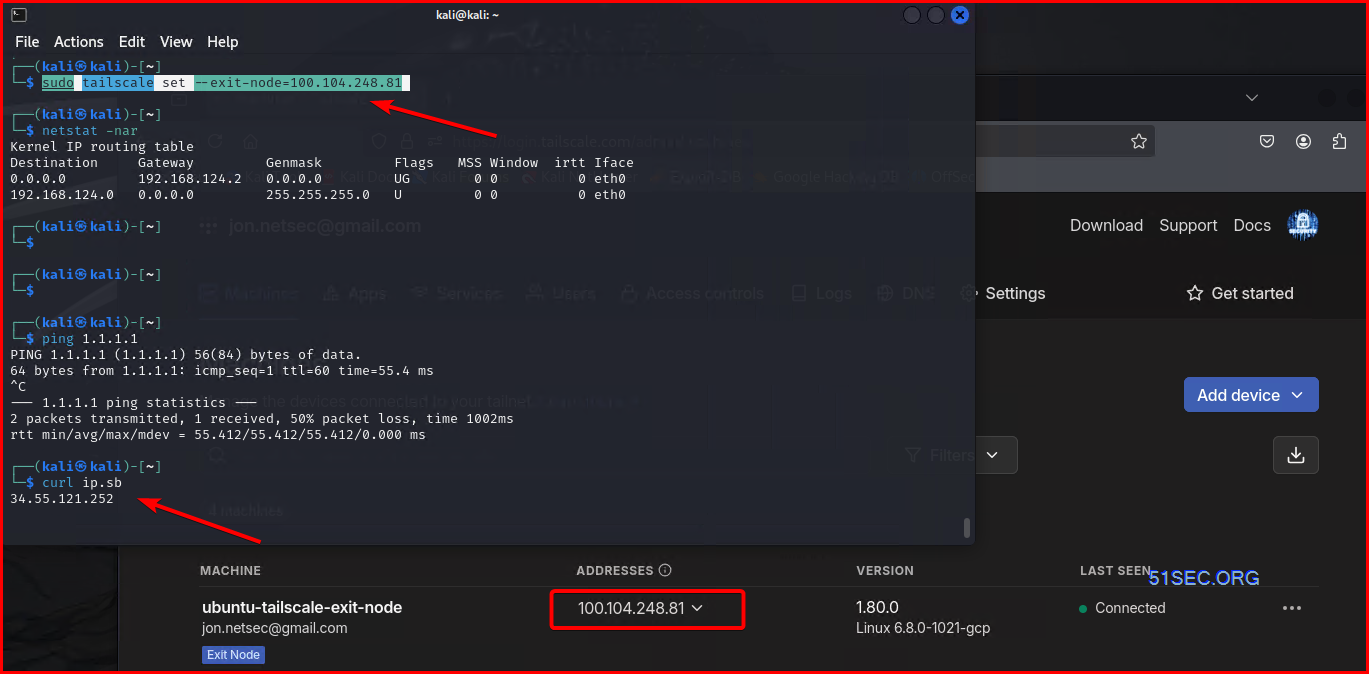
Run
tailscale setwith the--exit-node=flag, passing the Tailscale IP address of the exit node.You can find the IP address for the device from the admin console or by running
tailscale status.Alternatively, set
--exit-node-allow-lan-accesstotrueto allow direct access to your local network when routing traffic through an exit node.To stop using an exit node, run the
--exit-nodeflag without passing in an IP address.
Example in linux:
- sudo tailscale set --exit-node=100.104.248.81
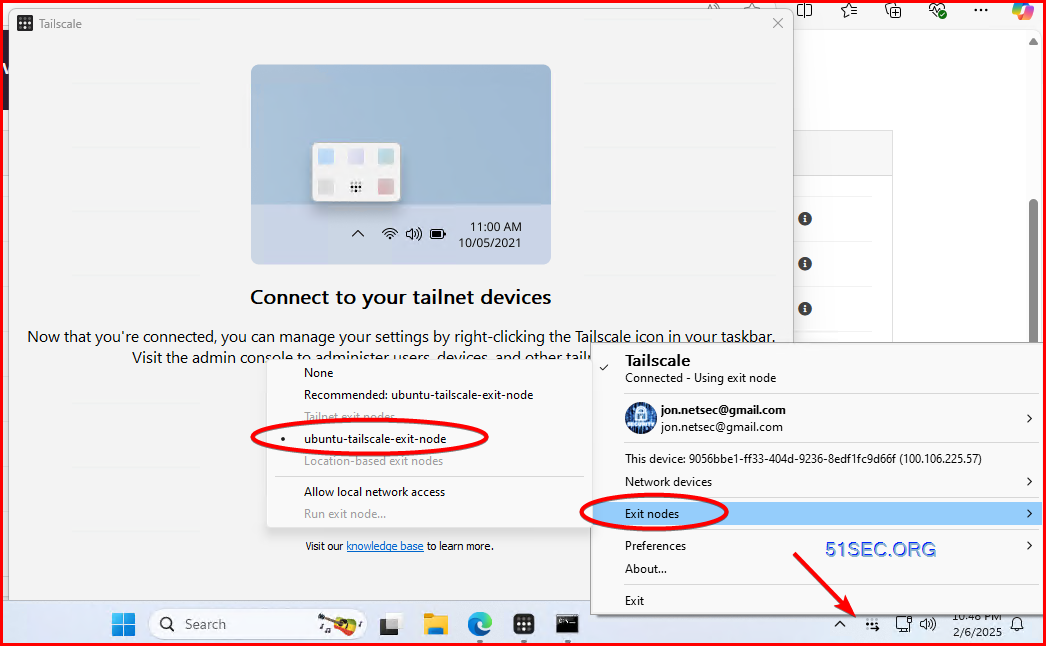
Enable exit node for your windows client
└─$ ip route show table all
default dev tailscale0 table 52
100.79.139.121 dev tailscale0 table 52
100.100.100.100 dev tailscale0 table 52
100.104.248.81 dev tailscale0 table 52
100.106.225.57 dev tailscale0 table 52
throw 127.0.0.0/8 table 52
192.168.124.0/24 dev tailscale0 table 52
default via 192.168.124.2 dev eth0 proto dhcp src 192.168.124.142 metric 100
192.168.124.0/24 dev eth0 proto kernel scope link src 192.168.124.142 metric 100
local 100.99.193.85 dev tailscale0 table local proto kernel scope host src 100.99.193.85
local 127.0.0.0/8 dev lo table local proto kernel scope host src 127.0.0.1
local 127.0.0.1 dev lo table local proto kernel scope host src 127.0.0.1
broadcast 127.255.255.255 dev lo table local proto kernel scope link src 127.0.0.1
local 192.168.124.142 dev eth0 table local proto kernel scope host src 192.168.124.142
broadcast 192.168.124.255 dev eth0 table local proto kernel scope link src 192.168.124.142
fd7a:115c:a1e0::53 dev tailscale0 table 52 metric 1024 pref medium
fd7a:115c:a1e0::/48 dev tailscale0 table 52 metric 1024 pref medium
fe80::/64 dev tailscale0 table 52 metric 1024 pref medium
default dev tailscale0 table 52 metric 1024 pref medium
fd7a:115c:a1e0::d401:c155 dev tailscale0 proto kernel metric 256 pref medium
fe80::/64 dev tailscale0 proto kernel metric 256 pref medium
fe80::/64 dev eth0 proto kernel metric 1024 pref medium
local ::1 dev lo table local proto kernel metric 0 pref medium
local fd7a:115c:a1e0::d401:c155 dev tailscale0 table local proto kernel metric 0 pref medium
local fe80::bdbe:27d0:c368:cdb2 dev tailscale0 table local proto kernel metric 0 pref medium
local fe80::d721:c267:f232:99bc dev eth0 table local proto kernel metric 0 pref medium
multicast ff00::/8 dev eth0 table local proto kernel metric 256 pref medium
multicast ff00::/8 dev tailscale0 table local proto kernel metric 256 pref medium
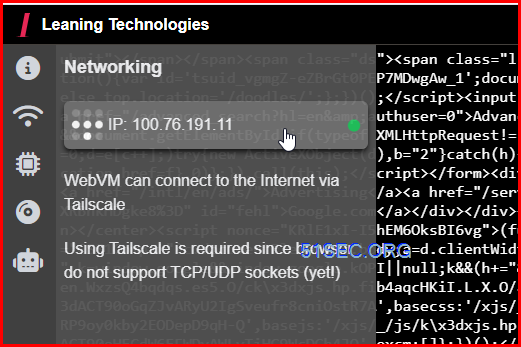
Use Case: Webvm
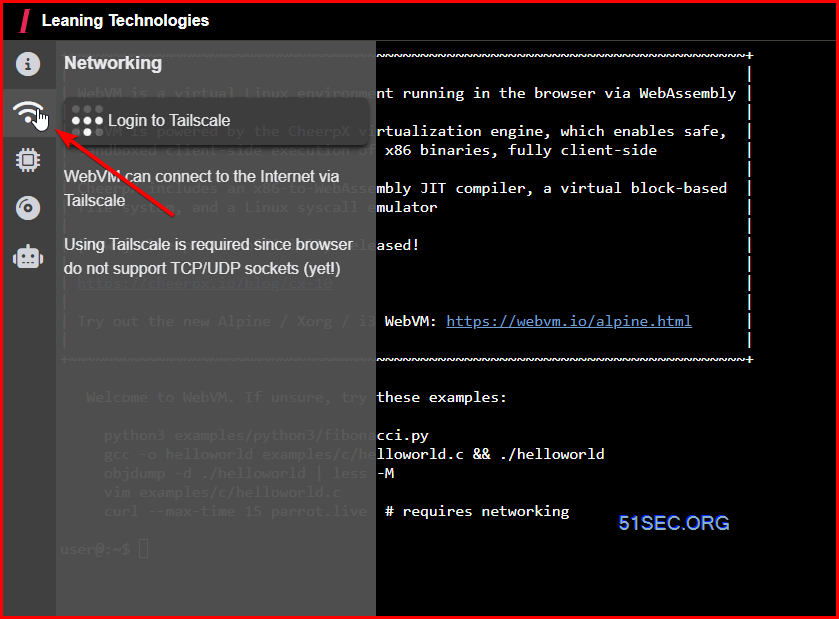
Once connected , you will see an ip address has been assigned to the vm.
- curl www.google.ca
- ssh <ssh server public ip>
List of free online SFTP servers
| Web | Check | Hostname | Login | Note |
|---|---|---|---|---|
| web | check | test.rebex.net:22 | demo/password | Also supports SSH, FTP/SSL, FTP, IMAP, POP3 and Time protocols. Read-only. |
| web | check | itcsubmit.wustl.edu:22 | - | Only for connection test. No public username/password available. |
| web | n/a | demo.wftpserver.com:2222 | demo/demo | Also supports FTP/SSL and FTP. |
Wing FTP Server Online Demo
We set up an online demo server for you to explore the new features available in Wing FTP Server. You can explore both Web-based Administration and Web-based Client.
Secure Web-based Administration:
- Location: https://demo.wftpserver.com:5466/
- Username: demo-admin
- Password: demo-admin
Secure Web-based Client:
- Location: https://demo.wftpserver.com/
- Username: demo
- Password: demo
Login using your own client with FTP, FTPS, SFTP protocol:
- Location: demo.wftpserver.com
- Username: demo
- Password: demo
- FTP Port: 21
- FTPS Port: 990
- SFTP Port: 2222
Note: all the demo accounts are read-only accounts, so you can not change server settings.
Videos
共有 0 条评论