
[5 Mins Docker] Bring OpenVPN Server Up and Running in One Docker Command
The OpenVPN Community Edition (CE) is an open source Virtual Private Network (VPN) project. It creates secure connections over the Internet using a custom security protocol that utilizes SSL/TLS. This community-supported OSS (Open Source Software) project, using a GPL license, is supported by many OpenVPN Inc. developers and contributors as well as the extended OpenVPN community. CE is free to deploy, but it does require a strong understanding of Linux and using the command line interface.
OpenVPN Tunneling Protocol
The OpenVPN tunneling protocol uses the Secure Socket Layer (SSL) encryption protocol to ensure data shared via the Internet remains private using AES-256 encryption. Because the code is available for audits, anyone can find — and fix — vulnerabilities. It’s not only considered the most secure VPN tunneling protocol, it also delivers faster connections and can bypass most firewalls.
Diagram

Docker Run or Docker-Compose
1 Install docker and docker-compose
apt update
apt install docker.io
apt install docker-compose
2 run one line command
original command from Github
docker run -it --rm --cap-add=NET_ADMIN / -p 1194:1194/udp -p 80:8080/tcp / -e HOST_ADDR=$(curl -s https://api.ipify.org) / --name dockovpn alekslitvinenk/openvpn
docker run -itd --rm --cap-add=NET_ADMIN / -p 1194:1194/udp -p 80:8080/tcp / -e HOST_ADDR=$(curl -s https://api.ipify.org) / --name dockovpn alekslitvinenk/openvpn
More with persisting configuraiton:
docker run -itd --rm --cap-add=NET_ADMIN / -p 1194:1194/udp -p 80:8080/tcp / -e HOST_ADDR=$(curl -s https://api.ipify.org) / --name dockovpn alekslitvinenk/openvpn / -v openvpn_conf:/opt/Dockovpn_data
3 Outputs
root@ub20-1-test:~# docker run -itd --rm --cap-add=NET_ADMIN / > -p 1194:1194/udp -p 80:8080/tcp / > -e HOST_ADDR=$(curl -s https://api.ipify.org) / > --name dockovpn alekslitvinenk/openvpn Unable to find image 'alekslitvinenk/openvpn:latest' locally latest: Pulling from alekslitvinenk/openvpn 29291e31a76a: Pull complete ee9d0fc0608b: Pull complete 050f6b5684f5: Pull complete 3df1fe3bf9f7: Pull complete 7663deeb3206: Pull complete ee20c2e12945: Pull complete Digest: sha256:86480f318120c9db963cd431ed08cd240c5eac1c3f74de689476ab68a4666765 Status: Downloaded newer image for alekslitvinenk/openvpn:latest 45f835677b614b285826a6bdfdd735ae9b24307b3605b58d27cd9a858837a4b7 root@ub20-1-test:~#
4 open http://<Public IP> to get your client profile which will be imported to your OpenVPN Client.
Once this http port accessed, it will be automatically shutted down. No more http opened to the world.
5 Download OpenVPN Client for Windows
OpenVPN Connect - Client Software For Windows | OpenVPN
Double click to install it.
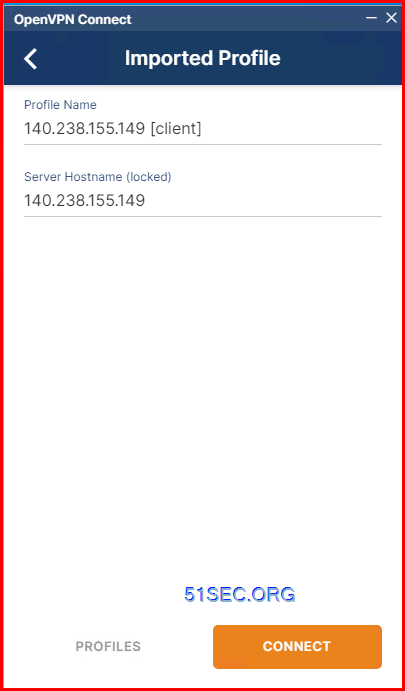
6 Run OpenVPN client and import step 4's downloaded file
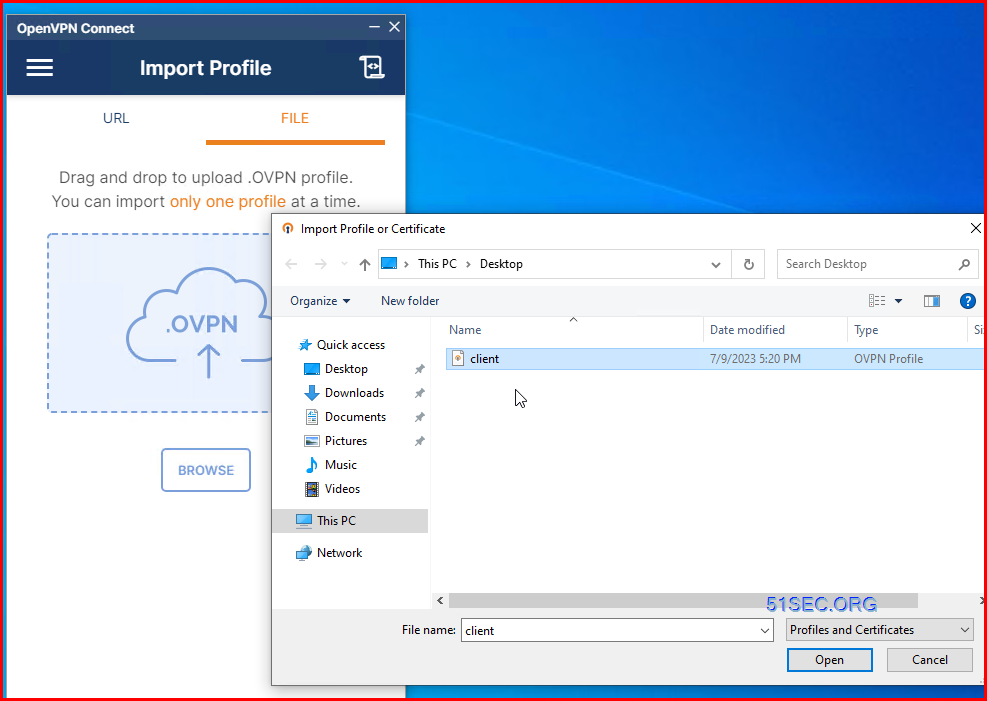
You will see your vpn profile has been added . Click connect:
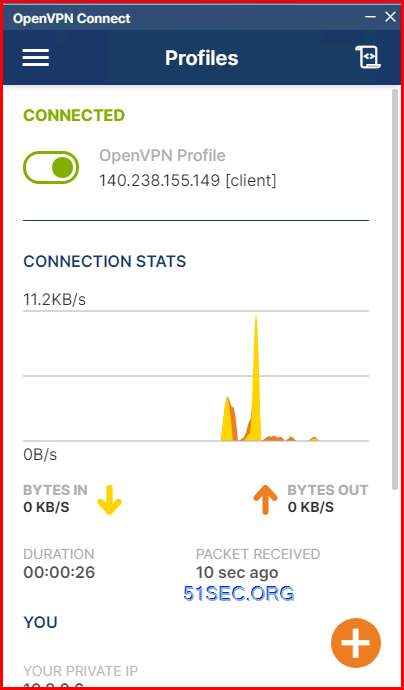
Verify your ip address from What Is My IP? Best Way To Check Your Public IP Address and speed from Internet Speed Test | Fast.com. Your Public ip will be changed to your VPS's ip now.
The downside of it is the speed performance might be limited by both of your VPS and internet connection.
Install from Cloud Provider's Marketplace
1 Log in to Oracle Cloud Account
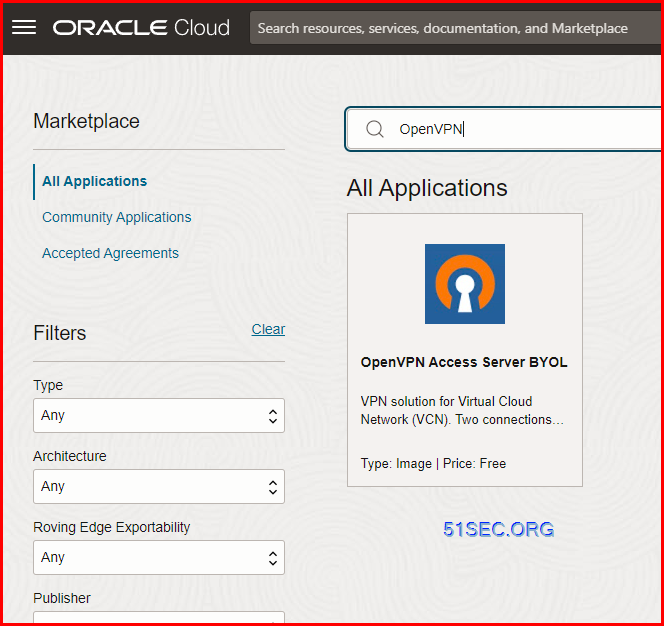
2 From Dropdown menu to choose marketplace then choose all applications

3 Search OpenVPN
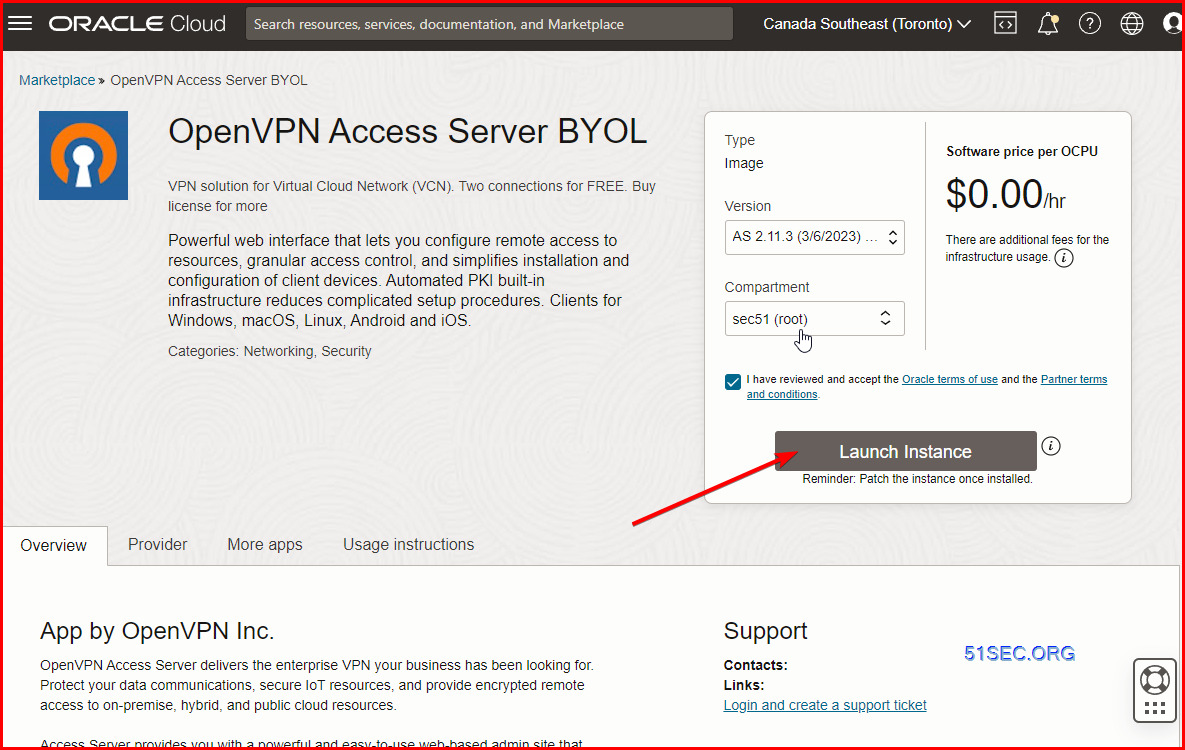
4 Lauch Instance
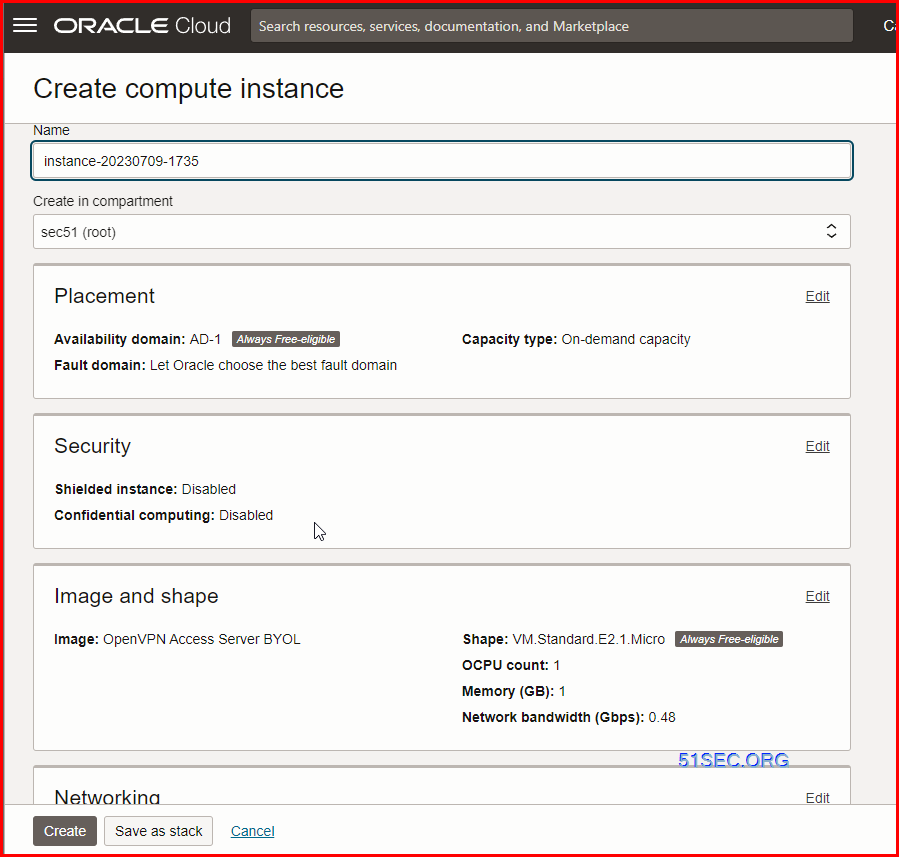
5 Create a free instance
Make sure ports 80/443/943, 1194 are open to the public.
| Direction | Source Type | Source | Protocol | Source Port | Destination Port |
|---|---|---|---|---|---|
| Ingress | CIDR | 0.0.0.0/0 | TCP | All | 943 |
| Ingress | CIDR | 0.0.0.0/0 | TCP | All | 22 |
| Ingress | CIDR | 0.0.0.0/0 | TCP | All | 443 |
| Ingress | CIDR | 0.0.0.0/0 | TCP | All | 945 |
| Ingress | CIDR | 0.0.0.0/0 | UDP | All | 1194 |
Videos
References
版权声明:
作者:lichengxin
链接:https://www.techfm.club/p/59252.html
来源:TechFM
文章版权归作者所有,未经允许请勿转载。
共有 0 条评论