
Use Your Notion Notes as Blog Posts
NotionNext is an opensource GitHub project which is based on Craig Hard's project nobelium, a static blog system built with NextJS and Notion API, deployed on Vercel. It is designed for Notion and all creators.
- NotionNext Demo:https://preview.tangly1024.com/ ,Project supports switching between multiple themes.
- Nobelium Demo: https://nobelium.vercel.app/
Features
Multiple Theme supported
Multiple Deployment solutions supported
- Fast page render and responsive design
- Fast static generation with efficient compiler
- Deploy on Vercel in minutes
- Incremental regeneration and no need to redeploy after update the content in notion
- Comments, full width page, quick search and tag filter
- RSS, analytics, web vital... and much more
- Rich config options, support English & Chinese interface
- Built with Tailwind CSS, easy for customization
Vercel Severless Deployment Steps
Reference: https://docs.tangly1024.com/article/vercel-deploy-notion-next

1 Copy my Notion Template
- Log into your Notion account (https://www.notion.so/)
- Click to open following template I shared out. URL: https://51think.notion.site/6a16d7fc702649b4aac2382259fb7391
- Click Duplicate at the top right which will copy whole template into your Notion account.
2 Get your own Page ID from your notion template
- Click the top right Share link: Share - > Published tab -> Share to Web
- Copy Page ID which is 32 characters mixed with letters and numbers
- Only the red text part, not else
- Here is my link and red text part is my page id.
- https://51think.notion.site/6a16d7fc702649b4aac2382259fb7391?v=4f1190087c3e453dadaace4161e112ca&pvs=4
3 Copy Github codes
- Log into Github account. If no Github account, please register one
- Click following original author's Github link and fork it to your Github account
- Original author's Github Link: https://docs.tangly1024.com/article/vercel-deploy-notion-next
- My modified Github repository link: https://github.com/JohnnyNetsec/NotionNext
4 Deploy to Vercel
- Log into Vercel account. You can choose Continue with Github
- Create a new project and select NotionNext repostion to import into your new project. Not click Deploy button.
- Don't click deploy yet. Lets create an Environment Variable
- Add a new variable : NOTION_PAGE_ID
- Value is the Page ID we copied from preivous step in Notion part.
- Now we can click Deploy button
- Wait two minutes for the completion.
- Now we should be able to visit our website using Vercle assigned url.
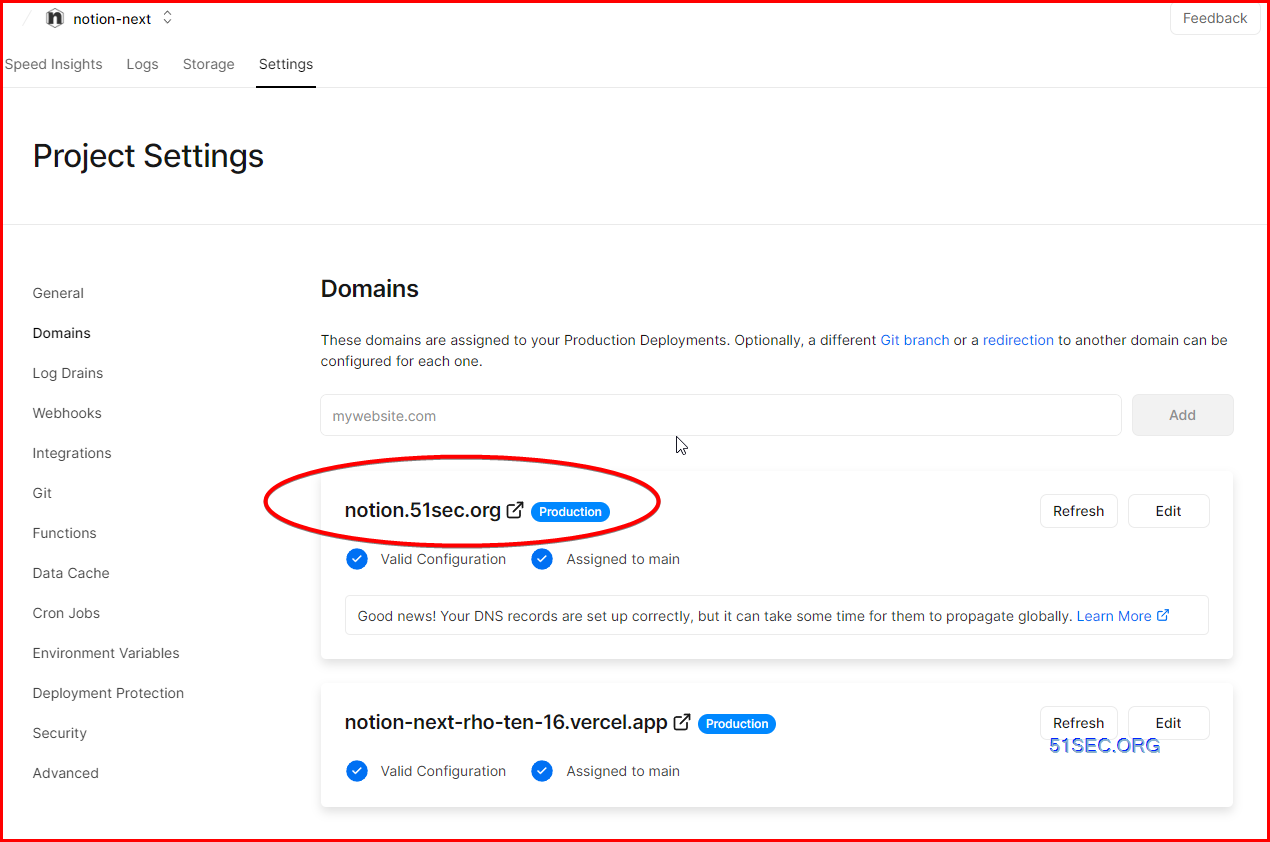
Use your own domain for Vercel Project
Vercel:
Setting→Domains→Add,enter your domain name:
It will show invalid configuraiton since cname record in your domain registrar did not add this record yet.
Once all done, you should be able to see valid configuraiton in your domains page:
Cloudflare setup screenshots example:
Use Notion extension to capture contents & use it as your blog post
Install Notion extension to your browser, such as Chrome:
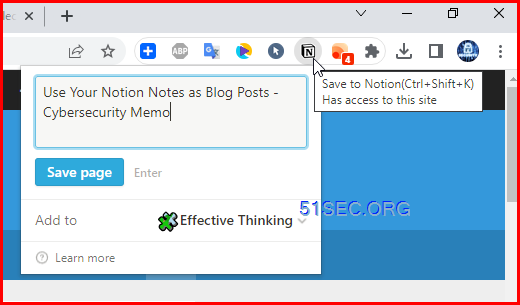
Once you see an interesting page from your browser, click it to save page to your Notion Database.
In my case, I created a Notion database as effective thinking which is https://notion.51sec.org
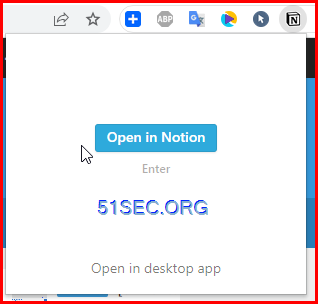
Click Save page button, it will be saved to your Notion site and you can directly open it in Notion.
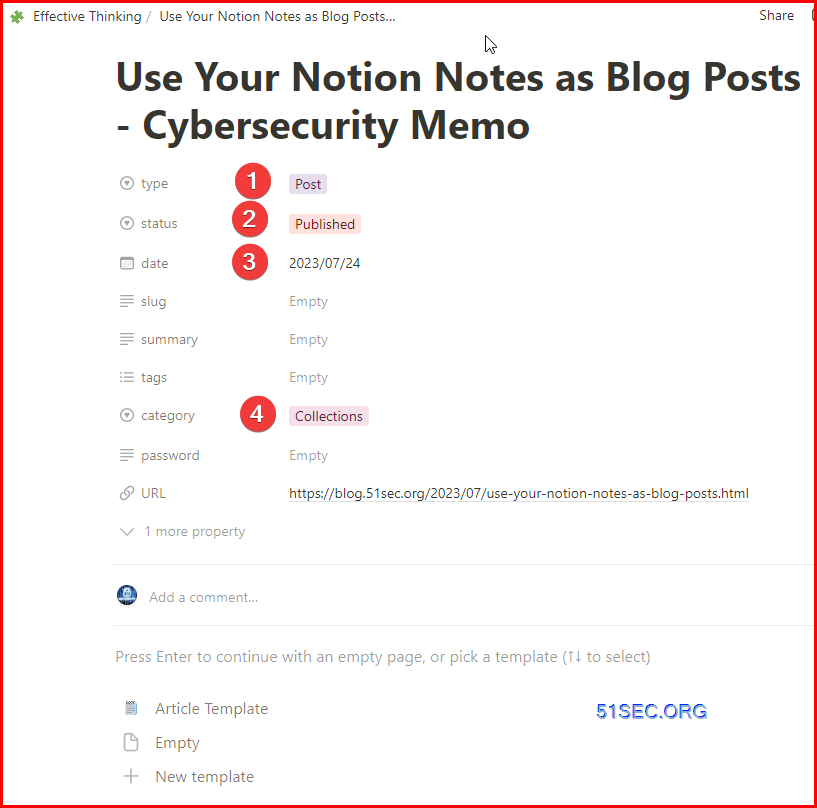
You will need to change four options to make this notion page shows in your website created in Vercel:
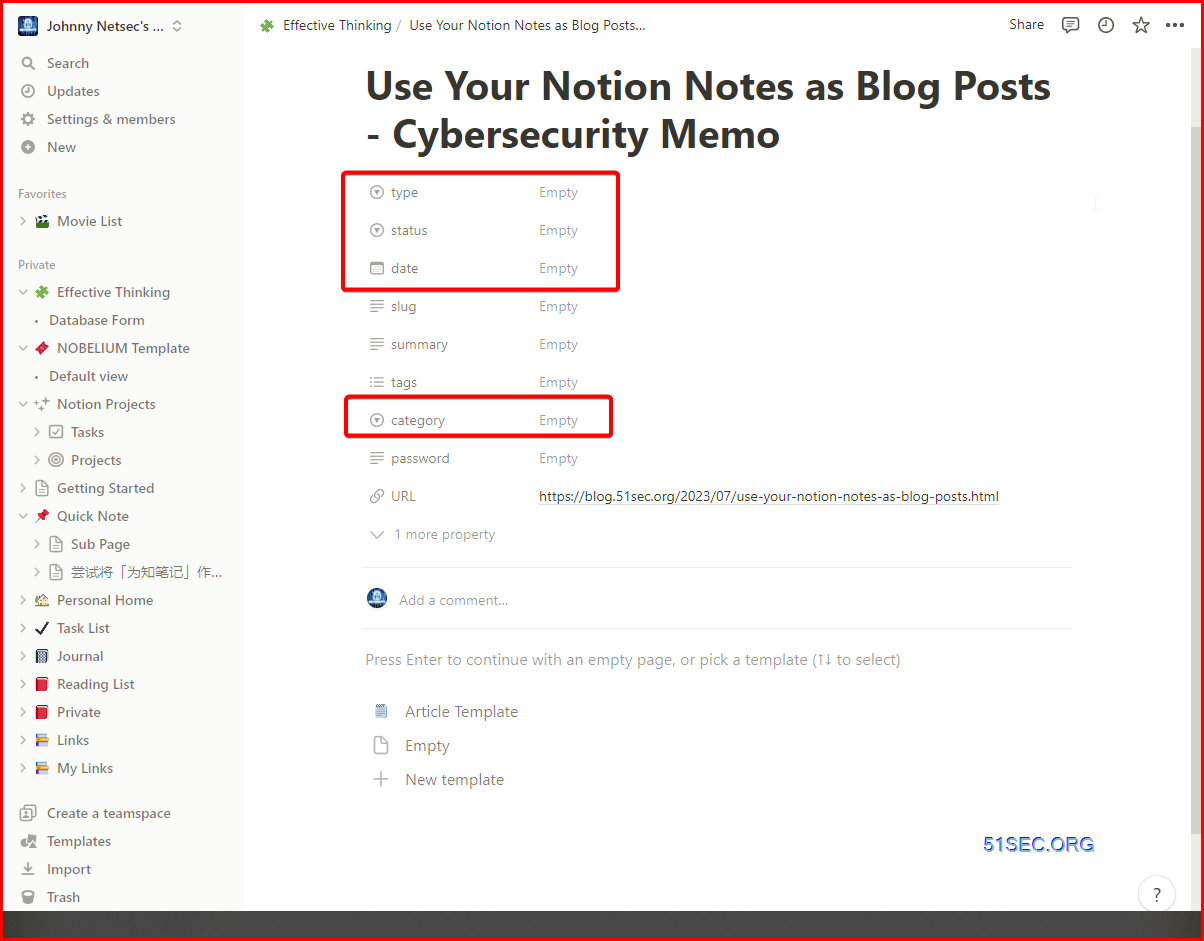
You will wait about five minutes to let your Vercel https://notion.51sec.org fetch the updates and show you this new content.
Here is the result how it looks like:
Videos
References
- https://www.notion.so/
- https://vercel.com/
版权声明:
作者:lichengxin
链接:https://www.techfm.club/p/61986.html
来源:TechFM
文章版权归作者所有,未经允许请勿转载。
THE END
二维码
共有 0 条评论