
Deploy a Free NAT Gateway, Firewall and Router in Azure – VNS3 NATe
I were looking for a free and light-weight virtual appliance to act as nat gateway in my cloud environment to do some port forwarding job. Azure NSG (Network Security Group) is not able to do nat or port forwarding. Load balancer can do but it is not free. Other firewall solution will do job well, but they are too powerful and expensive for my user case. Eventually, I found this virtual appliance from Marketplace which gives me almost all I need, except the 50Mbps bandwidth restriction.
VNS3 NATe - NAT Gateway virtual appliance includes firewall functions allowing outbound source and port NAT-ing and can limit outbound NAT to specific ports or destination addresses. Additionally, plugins can be used to provide outbound WAF or outbound URL filtering to a small "allow list" or via connection to a URL filtering service like Webroot's BrightCloud offering.
What does this used for?
Create GNS3 NATe Virtual Appliance from Marketplace
Search VNS3 and you will find out one VNS3 NATe - NAT Gateway Appliance
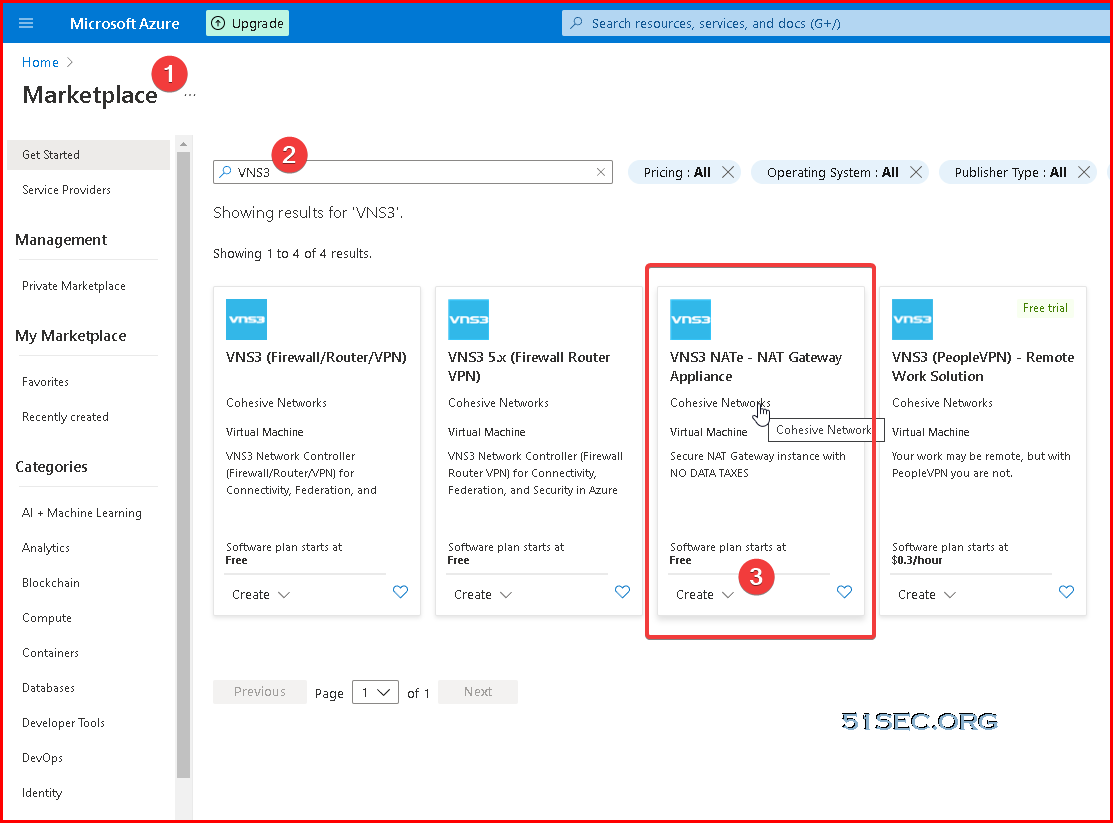
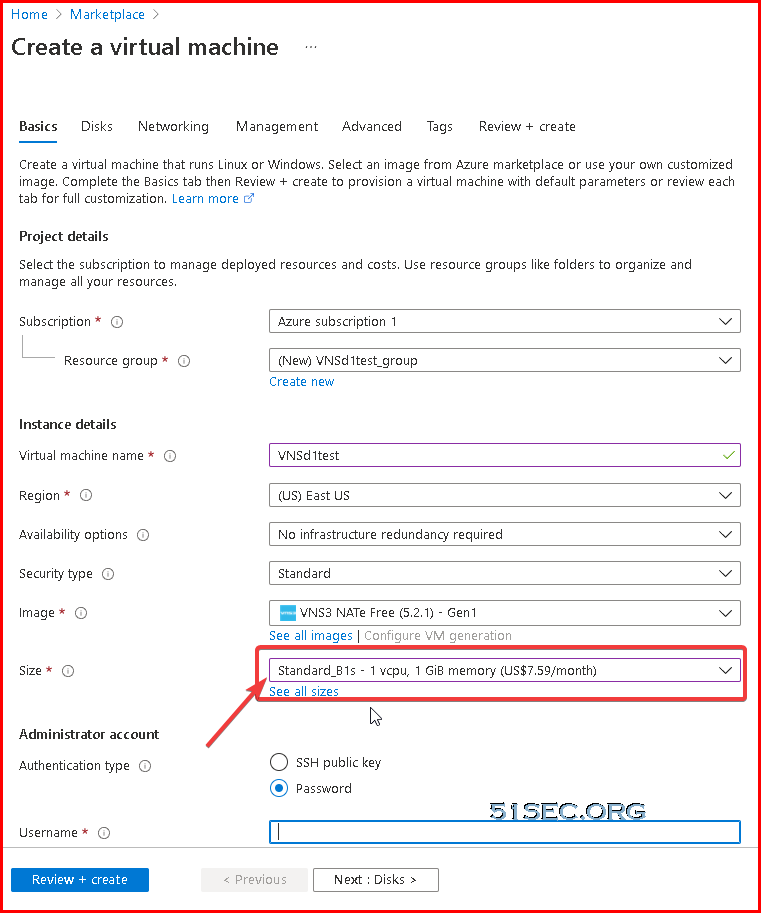
Lets choose latest free version, VNS3 NATe Free (5.2.1)
We can choose B1S size VM for this machine, which is just 1vCPU and 1GB memory.
By default, it will be only one NIC on this VM. We can use it as WAN (Untrust) interface. Later, we can add another NIC as LAN (Trust) interface.
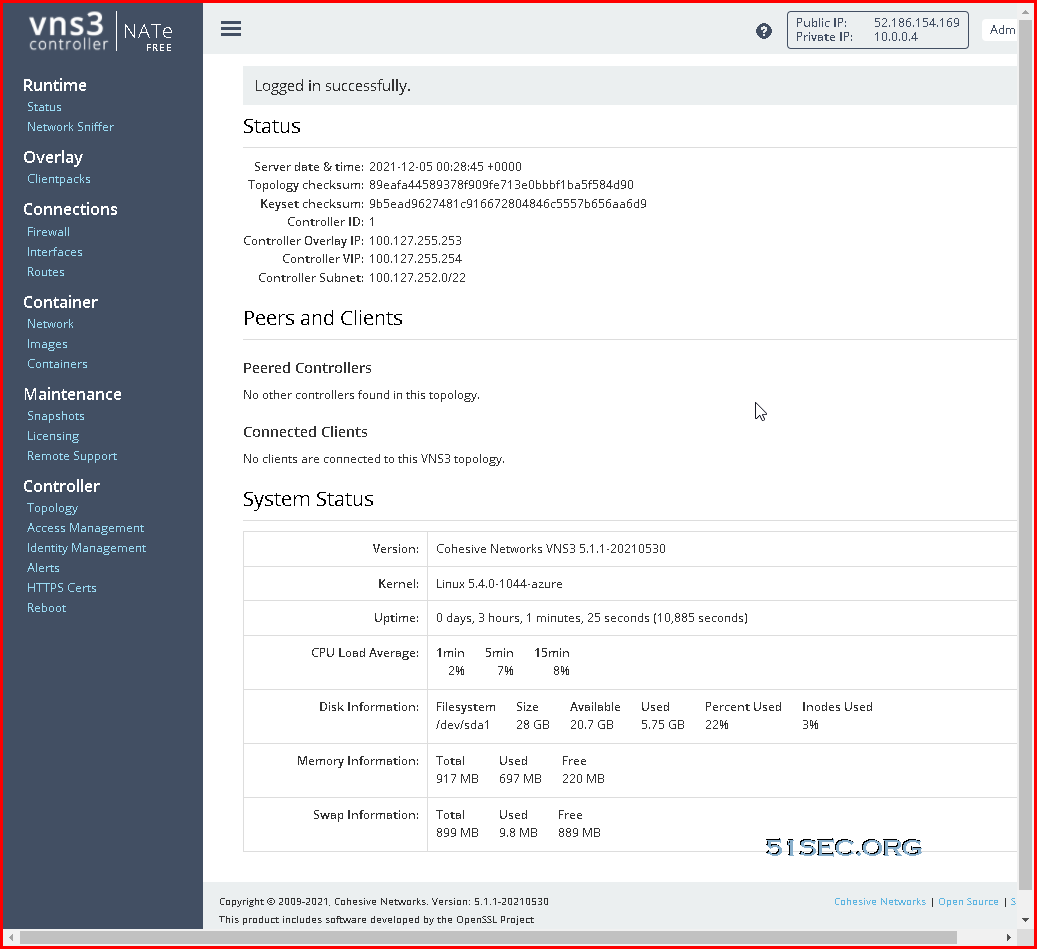
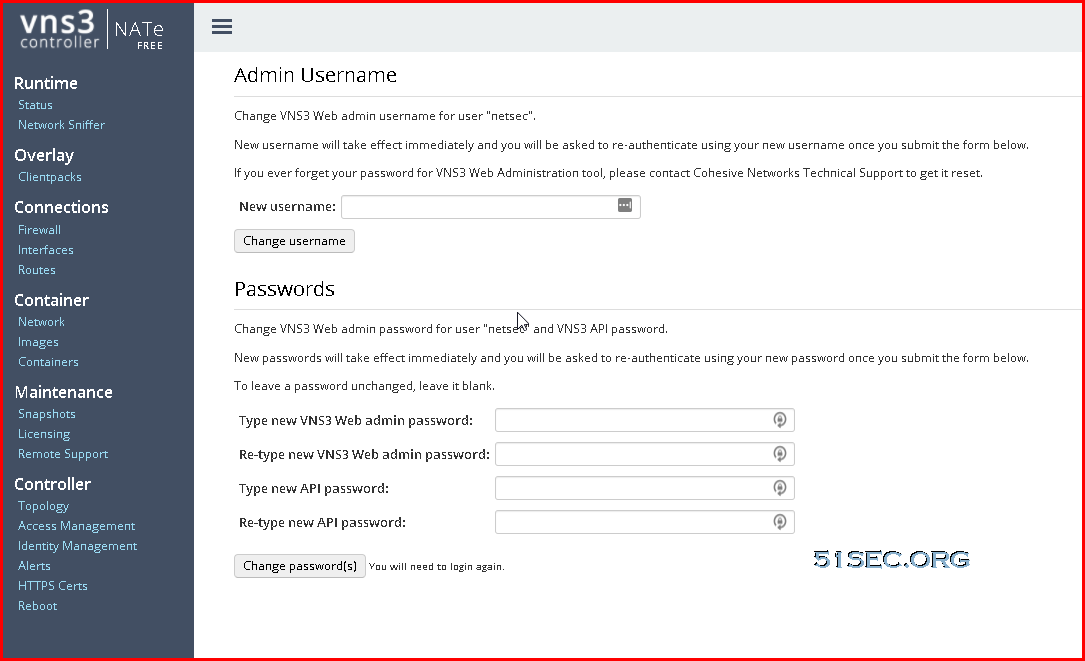
Log into VNS3 NATe VM's Web GUI and Change Credentials
After VM has been fully up and running, it will take 5 minutes at least for you to be able to open browser using https://<VM Public IP>:8000
Status Page
Azure Login Information
- VNS3 Web UI - https://VNS3-ip:8000 (e.g. https://123.123.123.123:8000)
- Default UI username - vnscubed
- Default UI password - VNS3_VM_name-VNS3_private_IP (e.g. vns3prod-10.0.0.4)
You will be prompted to ask for changing default username and password:
cFrom VM's networking page, click "Attach network interface" to start creating a new interface for VNS3 NATe VM.
We created new interface vns3-nate-lan, with subnet 10.0.2.0/24, which eventually gives ip 10.0.2.4 for this interface.
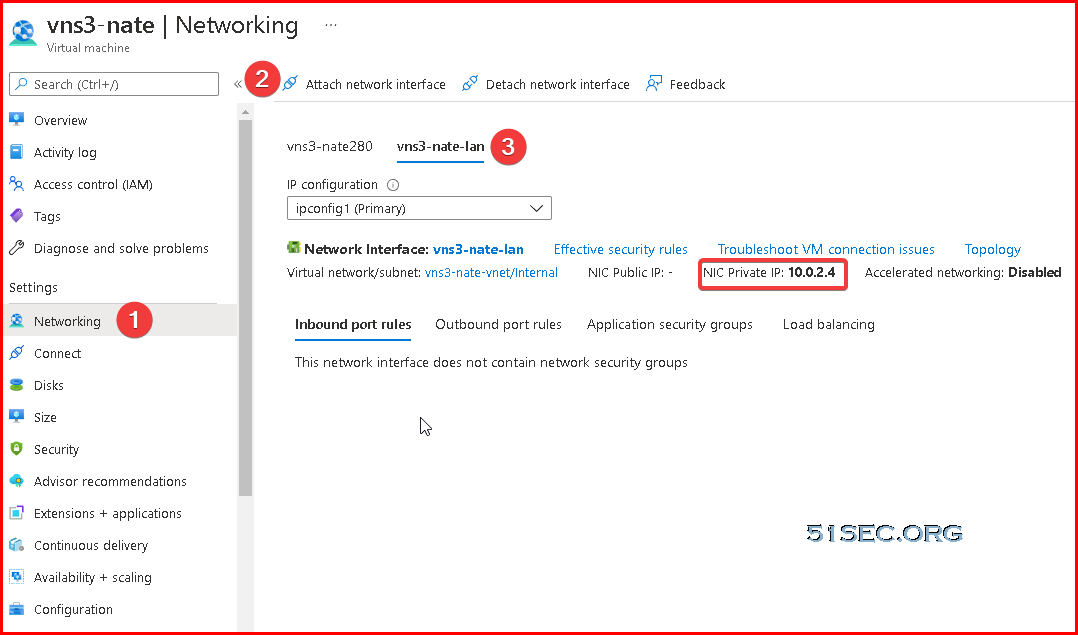
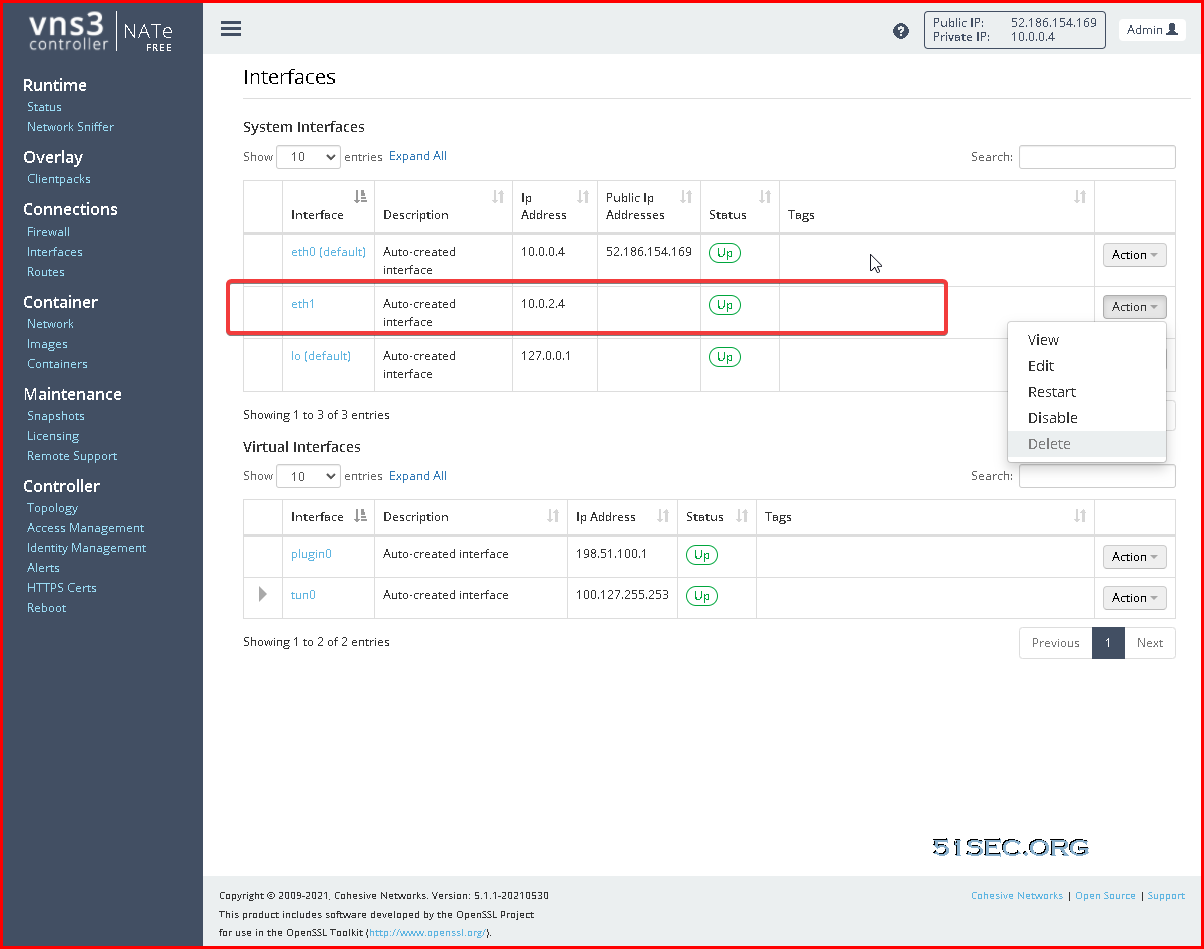
You will also need to enable this eth2 interface from web gui Inteface page.
Interface Page:
Create a New Route Table and New Route for LAN Subnet
By default, the new created LAN subnet (10.0.2.0/24) will use 10.0.2.1 as gateway for all network traffic. We will need to create a new route table to re-route traffic to our VNS3 NATe virtual appliance's LAN IP, 10.0.2.4.
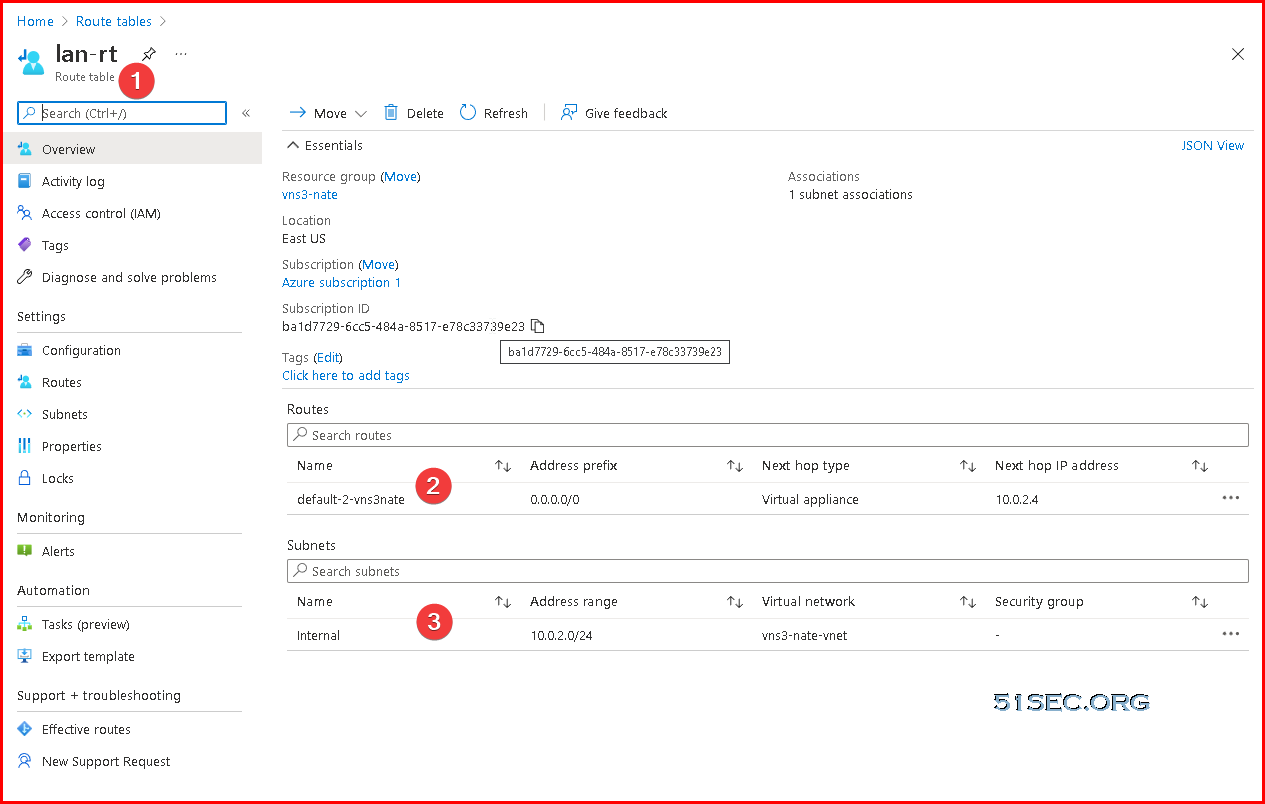
The last step for route table configuration is to associate LAN subnet 10.0.2.0/24 with this new created route table lan-rt. That will make sure all network traffic from 10.0.2.0/24 network will use VNS3 NATe gateway , 10.0.2.4.
We can launch a Win10 machine in the LAN subnet 10.0.2.0/24 to test the configuration. After route table change, When win10 visits Internet, it will use VNS3 NATe's public ip to go out.
Inbound Port Forwarding to LAN Server 10.0.2.5's 3389 Port
Now since we have full control to VNS3 NATe appliance, we can make some port NAT rule change.
In following example, we will redirect all 3389 traffic to our Internal LAN server 10.0.2.5, which is our Win10 test machine.
# Source NAT for traffic to the internet
POSTROUTING_CUST -o eth0 -j MASQUERADE-ONCE
# Allow outbound internet access
FORWARD_CUST -o eth0 -m conntrack --ctstate NEW,ESTABLISHED,RELATED -j ACCEPT
# Allow response traffic
FORWARD_CUST -i eth0 -m conntrack --ctstate RELATED,ESTABLISHED -j ACCEPT
# Example inbound port forward
PREROUTING_CUST -i eth0 -p tcp --dport 3389 -j DNAT --to 10.0.2.5:3389
# Allow example port forward DNAT to 10.0.1.15
# FORWARD_CUST -i eth0 -d 10.0.2.5 -p tcp --dport 3389 -j ACCEPT
共有 0 条评论